
The Instax Mini 11 is a favorite among instant camera fans, known for its simple design and cheerful photos. But sometimes, a blinking light on your Instax Mini 11 can leave you confused or worried. If you have faced this issue, you’re not alone. The blinking light is the camera’s way of trying to talk to you—telling you something needs attention. The key is understanding what each blinking pattern means, what causes it, and how to fix it confidently.
This guide explores everything you need to know about the Instax Mini 11 blinking light issue. You’ll learn what the signals mean, how to troubleshoot them, and how to prevent problems in the future. We’ll also cover 11 common causes, provide practical solutions for each, and share insights you might not find in your camera’s manual.
If you want your Instax Mini 11 to work smoothly and take bright, beautiful photos every time, keep reading.
What Does The Instax Mini 11 Blinking Light Mean?
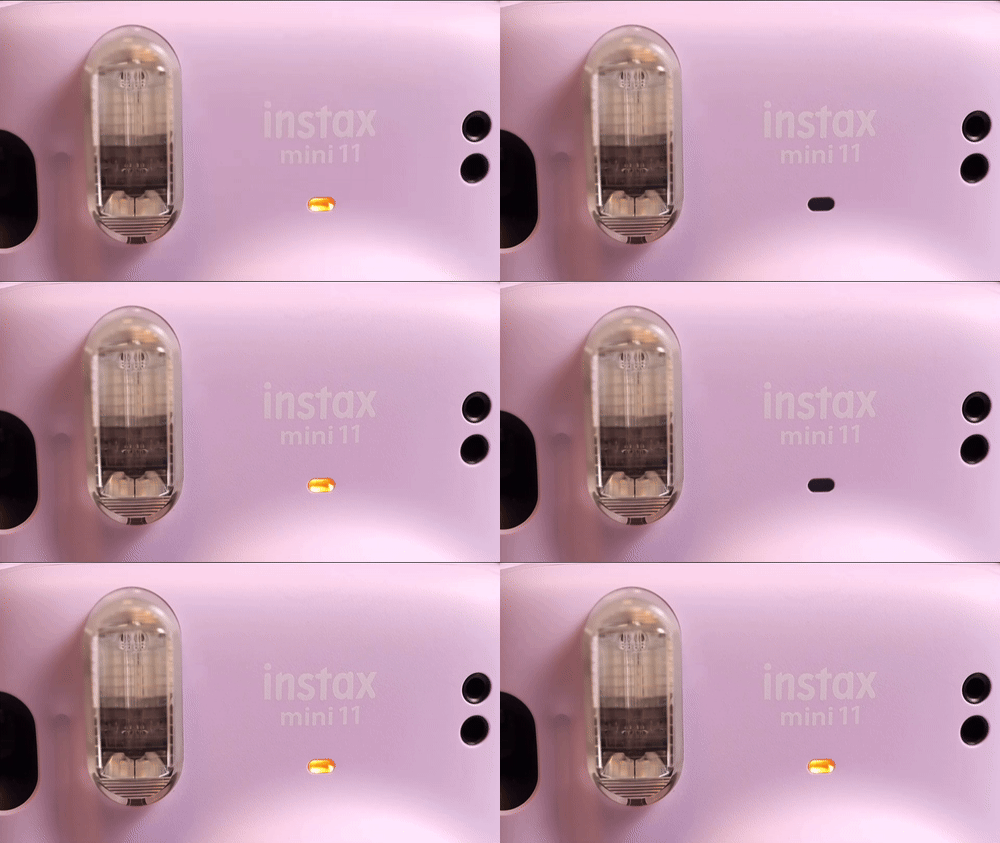
The blinking light on your Instax Mini 11 is not just a random signal. It tells you about the camera’s condition or an action you need to take. Sometimes, the light blinks quickly, slowly, or in a certain color, each with a unique meaning. For example, a blinking orange light usually warns you about a battery issue, while a blinking red can mean a film problem.
Many users panic when they see a blinking light, but it’s often a simple issue. Learning to “read” these signals can save you time, money, and frustration. The Instax Mini 11 is designed to be user-friendly, so most problems are easy to fix once you know what the light is telling you.
Why The Instax Mini 11 Light Blinks: 11 Common Causes
Each cause of a blinking light comes with its own symptoms, reasons, and solutions. Let’s look at the 11 most common causes, what they mean, and what you can do.
1. Low Or Dead Batteries
The most frequent cause is low or dead batteries. The Instax Mini 11 uses two AA batteries. When they lose power, the camera can’t eject film or power the flash, so the light blinks.
Symptoms: Orange or red light blinks, camera won’t turn on, or won’t take photos.
What to do: Replace both AA batteries with fresh ones. Don’t mix old and new batteries. If possible, use alkaline or high-quality rechargeable batteries, as cheap ones lose power faster.
Non-obvious tip: Always carry spare batteries. Many users forget that even new batteries can lose power quickly in cold weather.
2. Incorrect Battery Installation
Sometimes, batteries are put in the wrong way. The camera needs batteries installed with the correct polarity (positive and negative sides).
Symptoms: Light blinks even after changing batteries, camera is unresponsive.
What to do: Open the battery compartment, check the diagram inside, and make sure both batteries are facing the right direction. If you’re unsure, remove and re-insert them slowly.
Non-obvious tip: Check for any dirt or corrosion on the battery contacts, which can block power even if the batteries are fine.
3. Film Not Loaded Properly
If film is not loaded the right way, the camera will blink to warn you. The Mini 11 can’t take photos without a properly inserted film pack.
Symptoms: Blinking light, camera won’t eject a film sheet, or “S” symbol stays on the counter.
What to do: Open the back, check if the film pack is installed flat and snug. The yellow mark on the film pack should match the yellow mark inside the camera. If you just loaded film, make sure you removed the black cover sheet.
Non-obvious tip: Never open the back when film is inside, or you’ll ruin the remaining shots.
4. Film Jam Or Ejection Problem
Sometimes, film gets jammed and can’t eject after shooting. This causes a blinking light and can lead to wasted film.
Symptoms: Blinking light, film stuck in the slot, camera makes noise but nothing comes out.
What to do: Turn off the camera and gently remove the jammed film. Don’t use force—wiggle carefully. If stuck badly, open the film door only if you’re ready to lose that shot.
Non-obvious tip: Never try to pull film from the slot with sharp objects; this can damage internal parts.
5. Empty Film Pack
If you finish a film pack, the camera blinks to remind you it’s time for a new one.
Symptoms: Blinking light, “0” on the shot counter, nothing happens after pressing the shutter.
What to do: Open the back and insert a new pack of Instax Mini film. Make sure to match the yellow marks.
Non-obvious tip: Always check the shot counter before a big event to avoid missing important moments.
6. Flash Charging
The Instax Mini 11 uses a built-in flash for every photo. If the flash is charging (especially with weak batteries), the light may blink.
Symptoms: Blinking light after turning on, camera waits before letting you shoot.
What to do: Wait a few seconds until the light stops blinking. If it takes too long, check or replace the batteries.
Non-obvious tip: Frequently using the flash drains batteries faster. If you notice slow charging, it’s time for new batteries soon.
7. Camera Not Closed Properly
If the camera body or film door isn’t closed fully, the blinking light warns you that something isn’t right.
Symptoms: Light blinks, camera makes rattling sounds, film doesn’t advance.
What to do: Check that the film door is snapped shut. Also, make sure the lens barrel is extended fully when powered on.
Non-obvious tip: Even a small gap can trigger errors, so always double-check after changing film or batteries.
8. Faulty Or Dirty Battery Contacts
With time, the battery contacts inside the camera can get dirty or corroded, especially if batteries leaked.
Symptoms: Fresh batteries don’t solve the blinking light, camera acts dead.
What to do: Use a clean, dry cotton swab to gently clean the battery contacts. If you see white or green corrosion, use a little vinegar (on the swab), then wipe dry.
Non-obvious tip: Never use wet batteries or insert batteries with corroded contacts.
9. Extreme Temperatures
The Instax Mini 11 is sensitive to very cold or hot temperatures. Batteries and film both perform poorly in the wrong environment.
Symptoms: Blinking light, weak flashes, bad photo quality.
What to do: Use the camera between 41°F and 104°F (5°C to 40°C). If very cold, warm up the camera and batteries in your pocket for a few minutes.
Non-obvious tip: In cold weather, keep the camera close to your body, not in an outer bag.
10. Physical Damage
If the camera is dropped or hit, internal parts can loosen. This can cause unexplained blinking lights.
Symptoms: Camera worked before, but blinks after a bump or fall. Sometimes the lens won’t extend.
What to do: Check for visible cracks or loose parts. Remove and reinstall the batteries and film. If problems continue, contact Fujifilm support.
Non-obvious tip: Using a wrist strap can prevent many drops—most camera repairs are from accidental falls.
11. Factory Defect Or Internal Failure
Rarely, a factory defect or electronic failure can cause blinking lights that won’t stop, no matter what you try.
Symptoms: Camera always blinks, even with new batteries and film, and resets don’t help.
What to do: If under warranty, contact Fujifilm or your seller for a replacement or repair. If out of warranty, repairs may cost more than a new camera.
Non-obvious tip: Register your camera when you buy it for faster service if something goes wrong.
Credit: igrs.itu.edu.tr
Instax Mini 11 Blinking Patterns: What Each Means
Understanding the blinking patterns helps you diagnose problems faster. Here’s a quick overview:
- Single, steady blink: Often battery or flash charging.
- Fast, repeated blink: Battery issue or film not loaded.
- Blinking after shutter press: Film jam or empty pack.
- Light never turns on: Possible internal failure.
If you notice a new pattern not listed here, check your Instax Mini 11 manual or the official Fujifilm website for updates.
How To Fix Instax Mini 11 Blinking Light: Step-by-step
Here’s a practical sequence to solve most blinking light issues:
- Turn off the camera.
- Check batteries: Remove and re-insert, or replace with new AA batteries.
- Inspect battery contacts: Clean gently if needed.
- Check film pack: Open the back, see if film is loaded and matches yellow marks.
- Check for jam: Look for stuck film in the ejection slot.
- Close all doors and panels: Make sure everything clicks shut.
- Power on and test: Wait for the blinking to stop.
- Test in different temperatures: Warm up if too cold.
- Check for physical damage: Look for cracks or loose parts.
- Try a different film pack: Sometimes a pack is defective.
- Contact support if all else fails.

Credit: www.youtube.com
Common Mistakes To Avoid
Many beginners make mistakes that can cause or worsen blinking light issues:
- Mixing old and new batteries: Always use two of the same type and brand.
- Opening film door with film inside: Ruins all undeveloped shots.
- Using low-quality batteries: These often can’t power the flash reliably.
- Ignoring temperature warnings: Film and batteries hate extreme cold or heat.
- Forcing jammed film: This can break the camera.
- Not waiting for the flash to charge: Impatience can cause double-exposures or blank shots.
Quick Comparison: Instax Mini 11 Vs. Instax Mini 9 (blinking Light Issues)
To show how the Mini 11 improved over earlier models, here’s a side-by-side look.
| Feature | Instax Mini 11 | Instax Mini 9 |
|---|---|---|
| Blinking Light Alerts | Clearer patterns, more reliable | Basic, sometimes confusing |
| Battery Efficiency | Better, lasts longer | Drains faster |
| Film Jam Detection | Improved warnings | Not as accurate |
Preventing Blinking Light Problems
Keeping your Instax Mini 11 working well is easy if you build good habits:
- Store batteries separately if not used for a long time.
- Keep camera in a case to avoid bumps or dust.
- Use the right film (only Instax Mini).
- Check shot counter before important events.
- Warm up camera in winter and avoid direct sunlight in summer.
- Clean battery contacts every few months.
- Use quality batteries—rechargeables can save money in the long run.
Real-world Examples
Here are two common situations and what users learned:
Case 1: Emma, a student, saw a blinking light after her camera got cold outside. She thought it was broken, but after warming the camera and replacing the batteries, it worked fine. Extreme cold can trick you into thinking there’s a bigger problem.
Case 2: Raj loaded a new film pack but left the yellow marks unmatched. The camera blinked and wouldn’t shoot. After reloading the film correctly, the blinking stopped. Always double-check film alignment.
These real-world stories remind us that most Instax Mini 11 blinking light issues have simple solutions.
When To Seek Professional Help
If you have tried every solution and your camera still blinks, it might be time to talk to Fujifilm support or a camera repair expert. Most repairs are not expensive, but for very old or damaged cameras, replacement might be more cost-effective.
For official troubleshooting and service, see the Fujifilm Instax Support page.
Data Table: Blinking Light Troubleshooting Actions
Here’s a quick reference for fixing each problem.
| Problem | What to Check | Action |
|---|---|---|
| Low batteries | Battery indicator, flashing light | Replace with new AA batteries |
| Wrong battery direction | Battery compartment | Re-insert batteries correctly |
| Film not loaded | Film pack, yellow marks | Insert new film, align marks |
| Film jam | Film slot | Remove jammed film gently |
| Empty film pack | Shot counter | Load new film pack |
| Flash charging | Flashing indicator | Wait a few seconds |
| Camera not closed | Film door, body | Close securely |
| Dirty battery contacts | Battery area | Clean with cotton swab |
| Extreme temperatures | Environment | Warm up or cool down camera |
| Physical damage | Exterior, lens | Inspect or repair |
| Internal failure | All above steps fail | Contact support |
Credit: igrs.itu.edu.tr
Instax Mini 11 Maintenance Tips
Taking care of your camera helps prevent blinking light issues:
- Remove batteries if you won’t use the camera for months.
- Store film in a cool, dry place.
- Don’t touch the lens or film exposure area.
- Clean the outside with a soft, dry cloth—never use water.
- Avoid dropping or shaking the camera.
- Test the camera before important occasions.
Bonus tip: If you’re traveling, pack batteries and film separately in your carry-on. Changes in pressure or temperature in checked baggage can cause problems.
Advanced Troubleshooting: When Problems Persist
If you have tried all basic steps and the light still blinks:
- Reset the camera: Remove batteries and film, leave the camera open for 10 minutes, then reinstall everything.
- Try a new film pack: Sometimes, a single defective pack causes issues.
- Test with another person’s batteries or film: This rules out battery or film problems.
- Contact official support: Persistent issues may need a technician.
Data Table: Instax Mini 11 Blinking Light—quick Reference Guide
This fast lookup table can help when you’re in a hurry.
| Blinking Pattern | Possible Cause | Solution |
|---|---|---|
| Single, slow blink | Flash charging | Wait for charge |
| Fast, repeated blink | Batteries or film | Check/replace batteries or film |
| Blinking after shutter | Jam/empty film | Clear jam, load new film |
| No light | Internal fault | Contact support |
Frequently Asked Questions
Why Does My Instax Mini 11 Blink After Changing Batteries?
This usually means the batteries are not installed correctly or are weak. Double-check battery direction and try a fresh pair. If the problem continues, clean the contacts inside the battery compartment.
What Should I Do If The Camera Blinks But Won’t Take Photos?
Check if the film pack is empty or jammed. Also, make sure the film door is closed completely. If everything looks fine, try new batteries and ensure the flash has time to charge.
Is It Safe To Open The Camera When The Light Is Blinking?
It’s best to turn off the camera first. Opening the back while the light blinks can ruin film or interrupt the camera’s functions. Only open the film door if you need to fix a jam or replace the pack.
Can Extreme Temperatures Cause Blinking Light Problems?
Yes, both hot and cold weather can affect battery power and film function, causing the camera to blink or misbehave. Try warming up the camera (in cold) or cooling it (if hot) before using.
How Long Should I Wait For The Blinking Light To Stop?
Usually, it stops in a few seconds, especially during flash charging. If it continues for more than a minute, check batteries, film, and camera doors. Persistent blinking may need further troubleshooting.
Keeping your Instax Mini 11 in top shape is simple if you understand what the blinking light is telling you. Most issues are easy to fix with a little patience and the right steps. With good habits, your camera will bring you instant joy for years to come.