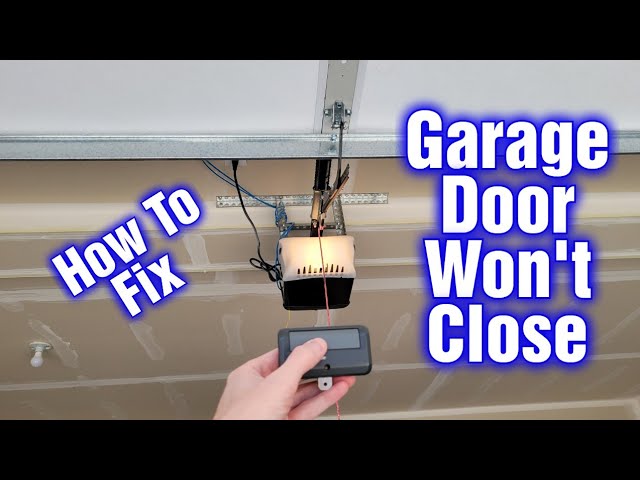
If your LiftMaster garage door opener starts blinking twice, it can be frustrating. The blinking light is a warning—it’s your opener’s way of telling you something is wrong. But what does “blinking twice” actually mean? Is it something you can fix yourself, or should you call a professional?
This guide is here to help. You’ll learn what causes the two-blink warning, how to troubleshoot the problem step by step, and practical tips to prevent it from happening again. Even if you’re not an expert, you’ll find clear explanations and real-world advice.
Understanding The Liftmaster Blinking Twice Signal
When a LiftMaster garage door opener flashes its main LED or safety sensor lights twice, it’s not random. The opener has built-in diagnostics. Each pattern of blinks means a specific issue. The “blinking twice” code is one of the most common, and it’s a clear signal that something is wrong with the safety sensors.
What Are Safety Sensors?
Safety sensors are small devices near the bottom of your garage door tracks. There’s one on each side. They send an invisible beam across the door. If something (a person, pet, or object) breaks this beam while the door is closing, the door stops or reverses.
This is a critical safety feature required by law in the US since the 1990s.
What Does Two Blinks Mean?
If your LiftMaster opener flashes twice, it usually points to a safety sensor problem. The most common causes are:
- Misaligned sensors (the two units aren’t facing each other)
- Obstruction blocking the sensor beam
- Wiring issues (broken or loose wires)
- Faulty sensors
Some newer LiftMaster models may show the two-blink code on the main unit’s LED, while others use the small lights on the sensor heads. In both cases, the meaning is the same—the opener has lost communication with the safety sensors.
Why Does The Opener Blink Instead Of Just Stopping?
The blinking is a diagnostic tool. Instead of leaving you guessing, the opener tells you which area to check. Two blinks mean “check the sensors. ” Different numbers of blinks mean different things (e. g. , five blinks for a motor problem).
This makes troubleshooting much easier, especially for non-technical users.
Common Causes Of The Two-blink Warning
Understanding why the warning happens is key to fixing it. Let’s look at the most frequent reasons for the two-blink signal.
1. Sensor Misalignment
The most common cause is misalignment. The sensors must face each other perfectly. If one or both get bumped, even slightly, the beam is broken. This can happen if:
- You move items in the garage and accidentally hit a sensor
- Vibrations from the door slowly shift the sensors out of line
- The mounting brackets loosen over time
Even a tiny misalignment can cause the opener to blink twice.
2. Obstruction In The Sensor Path
Objects in the path will break the beam. Common obstructions include:
- Leaves, spider webs, or dust on the sensor lens
- Toys, bikes, or boxes placed near the tracks
- Snow or mud splashed onto the sensor
Sometimes, the blockage is not obvious. A thin layer of dirt or a small object is enough.
3. Wiring Problems
The sensors connect to the opener with thin wires. Over time, these wires can:
- Become loose at the terminal block
- Break from repeated movement
- Get chewed by rodents or damaged by water
If the opener loses electrical contact with one or both sensors, you’ll see the two-blink warning.
4. Faulty Sensors
Sensors can fail. Age, moisture, or physical damage can cause an internal short or open circuit. If a sensor stops working, the opener will not close the door for safety reasons.
5. Sunlight Or Strong Light Interference
Direct sunlight or bright LED lights shining on the sensor can “blind” it. The sensor thinks the beam is blocked, even if there’s nothing in the way. This is less common but can happen in garages facing west or east.
6. Power Issues
Occasionally, a power surge or brownout can confuse the opener’s electronics. This usually fixes itself after a reset but can sometimes trigger a two-blink warning.

Credit: www.qualitydoorcompany.com
Step-by-step Troubleshooting For Liftmaster Blinking Twice
If your garage door opener is giving you the two-blink warning, don’t panic. Most problems can be fixed without special tools. Here’s how to diagnose and solve the issue.
1. Observe The Sensor Lights
Both sensors have a small LED indicator. One is the “sender” (usually amber or yellow), and the other is the “receiver” (usually green).
- Solid lights: Both sensors are working and aligned.
- One light off or both blinking: There’s a problem.
Check both units before doing anything else.
2. Clean The Sensor Lenses
Even a thin film of dust or cobwebs can block the beam.
- Use a soft cloth to gently wipe the lenses.
- Don’t use harsh chemicals or rough materials.
Check if the lights change after cleaning.
3. Check For Obstructions
Look along the sensor beam path—from one sensor to the other, just a few inches off the ground.
- Remove any boxes, toys, or debris.
- Make sure nothing is hanging or draped in the way.
Test the door. If it closes normally, you’ve solved the problem.
4. Realign The Sensors
This is the most common fix. Here’s how:
- Loosen the wing nut or screw holding the sensor bracket (but don’t remove it).
- Gently adjust the sensor until its LED glows steady (not blinking).
- Repeat on the other side.
- Tighten the bracket when the light stays solid.
If the lights still blink, move to the next step.
5. Inspect The Wiring
Check the wires from each sensor up to the opener.
- Look for loose, frayed, or broken wires.
- Make sure the wires are firmly attached at both ends.
If you find a problem:
- Re-strip the wire (remove a small section of insulation).
- Reconnect it securely to the terminal.
If you’re unsure, take a photo before disconnecting anything.
6. Test For Faulty Sensors
Sometimes, a sensor fails even if everything looks normal.
- Swap the sensors (left to right, right to left).
- If the problem follows the sensor (e.g., the same light stays off), that sensor is bad.
Replacement sensors are available for most LiftMaster models.
7. Check For Sunlight Interference
If the problem happens only at certain times (e. g. , late afternoon), sunlight may be the cause.
- Shade the sensor with a piece of cardboard temporarily.
- If the door works, consider installing a sun shield or moving the sensor slightly.
8. Power Cycle The Opener
A simple reset can sometimes clear an error.
- Unplug the opener from the outlet.
- Wait 30 seconds.
- Plug it back in.
- Test the door.
If the issue remains, you may need professional help.
Troubleshooting Summary Table
Here’s a quick reference for the most common two-blink causes and fixes:
| Cause | Symptoms | Solution |
|---|---|---|
| Misaligned sensors | LEDs not solid, door won’t close | Realign sensors until LEDs are steady |
| Obstruction | LED blinking, something in path | Remove all objects and clean lenses |
| Wiring problem | One or both LEDs off | Check and reconnect wires |
| Faulty sensor | Problem stays with same sensor after swapping | Replace bad sensor |
| Sunlight interference | Works only at certain times of day | Shade sensor or reposition |
How To Prevent Future Two-blink Issues
Fixing the problem is good, but preventing it is even better. Here’s what you can do.
1. Secure Sensor Mounts
Make sure the brackets holding your sensors are tight. If they’re loose, vibrations will knock them out of alignment over time. Use a screwdriver or wrench to check and tighten them every six months.
2. Keep The Area Clear
Don’t store bikes, tools, or boxes near the bottom of the garage door tracks. This is the most common reason sensors get bumped or blocked.
3. Clean Regularly
Wipe the sensor lenses with a soft cloth every few months. Dirt and webs build up faster than you think.
4. Check Wires After Storms
Heavy rain, snow, or mice can damage the wiring. Inspect the wires after storms or if you see signs of pests.
5. Shield From Sunlight
If sunlight is a regular problem, consider:
- Installing a simple sun shield (a small cover over the sensor)
- Moving the sensor slightly (within the limits allowed by the tracks)
6. Test The Safety System
Every few months, test the sensors:
- Close the door using the wall button.
- Wave an object (like a broomstick) in front of the sensors as the door closes.
- The door should reverse immediately.
If not, check for a blinking warning and troubleshoot.
Maintenance Tips Table
Simple, regular maintenance can save you time and money. Here’s a quick guide:
| Task | How Often | Why It Matters |
|---|---|---|
| Clean sensor lenses | Every 3 months | Prevents false obstruction signals |
| Check sensor alignment | Every 6 months | Keeps system working reliably |
| Inspect wiring | After storms/pests | Avoids sudden failures |
| Test safety reversal | Quarterly | Ensures door reverses for safety |
Advanced Troubleshooting: When The Basics Don’t Work
Sometimes, the two-blink warning doesn’t go away even after you try all the basic fixes. Here are some advanced steps for persistent problems.
1. Check For Voltage At The Sensors
If you have a multimeter, you can check if power is reaching the sensors.
- Unplug the opener for safety.
- Set the multimeter to DC volts.
- Touch the probes to the sensor wires.
- You should see about 5 volts DC.
If there’s no voltage, the problem is inside the opener, not the sensors.
2. Inspect For Water Intrusion
Moisture inside the sensor can cause corrosion or a short circuit.
- Look for water or rust on the sensor or wires.
- Replace any damaged parts.
3. Replace Both Sensors
If one sensor fails, the other might be close behind. Replacing both at the same time is often easier and more reliable.
- Buy the correct part number for your opener model.
- Follow the instructions exactly—incorrect wiring can damage the opener.
4. Firmware Or Logic Board Issues
Rarely, the opener’s main logic board can develop a fault. Signs of a logic board problem:
- Opener won’t respond to any remote or wall button
- Lights blink but all sensors and wiring are fine
- Other strange behavior (random opening, not closing at all)
In this case, professional service is recommended. Replacing a logic board is not a DIY project for most people.
5. Avoiding Common Diy Mistakes
Many users accidentally make things worse. Here are two mistakes to avoid:
- Swapping wires without labeling: Always label wires before disconnecting. Mixing them up can create new problems.
- Forcing the door closed: Never bypass the sensor system permanently. This is dangerous and can void your warranty.
When To Call A Professional
If you’ve tried all the steps above and your LiftMaster opener still blinks twice, it’s time for expert help. Professional technicians have tools and experience to diagnose deeper problems, such as:
- Damaged internal circuitry
- Intermittent wiring faults
- Compatibility issues with aftermarket sensors
Most repairs cost between $80 and $200, depending on your region and the complexity of the fix. If your opener is more than 10 years old, consider replacing it with a newer, more reliable model.

Credit: www.reddit.com
Liftmaster Safety Sensor Compatibility Guide
Not all sensors work with every LiftMaster opener. Before buying replacements, check compatibility.
| Opener Model | Compatible Sensor Part Number | Year Range |
|---|---|---|
| Chamberlain/LiftMaster 41A5034 | 41A5034 | 1997-2005 |
| LiftMaster 041-0136 | 041-0136 | 2006-present |
| MyQ Series | 041-0136 | 2011-present |
Always check your opener’s manual or the manufacturer’s website for the most up-to-date compatibility information. Using the wrong sensor can cause the two-blink error and may damage the opener.
Non-obvious Insights Most Users Miss
- Sensor Wiring Polarity Matters: Some LiftMaster openers are sensitive to which wire goes where. Reversing wires at the sensor can cause errors. Always match the wire colors or labels exactly.
- The Wall Button Override: Most LiftMaster openers allow you to close the door by holding down the wall button, even if the sensors are blocked or misaligned. This is a safety feature for emergencies only. Don’t use it as a permanent fix.
- Hidden Power Supply Issues: If your garage shares a circuit with heavy appliances (like a freezer), voltage drops can cause sensor errors. If the two-blink warning appears only when other appliances run, consider moving the opener to its own circuit.
Credit: www.youtube.com
Frequently Asked Questions
Why Is My Liftmaster Garage Door Opener Blinking Twice But Still Opens Sometimes?
This usually means the sensors are just barely aligned. Small vibrations or temperature changes can shift them enough to trigger the warning. Align the sensors until the LEDs are solid and test multiple times.
Can I Bypass The Sensors If They Keep Causing Problems?
Bypassing the sensors is strongly discouraged and may be illegal in some areas. Safety sensors prevent accidents and injury. If you must close the door, use the wall button override by holding it down until the door is fully closed.
Fix the root problem as soon as possible.
How Do I Know If My Sensors Are Compatible With My Liftmaster Opener?
Check your opener’s model number and refer to the compatibility table above or your owner’s manual. You can also visit the official LiftMaster support site for accurate information.
What Should I Do If The Sensors Are Aligned And Clean But The Opener Still Blinks Twice?
Check the wiring for damage or corrosion. Test for voltage at the sensors. If everything checks out, you may have a faulty sensor or a problem with the opener’s logic board. At this point, replacement or professional repair is recommended.
How Often Should I Test The Safety Sensors On My Liftmaster Opener?
Test the sensors at least every three months. Simply close the door and wave an object in front of the sensors. The door should reverse immediately. Regular testing ensures your system works when you need it most.
Conclusion
Your LiftMaster garage door opener is a reliable device, but like any machine, it needs a little care. Understanding the two-blink warning and knowing how to fix it puts you in control. With the guidance above, you can keep your garage safe and your opener working smoothly, year after year.