
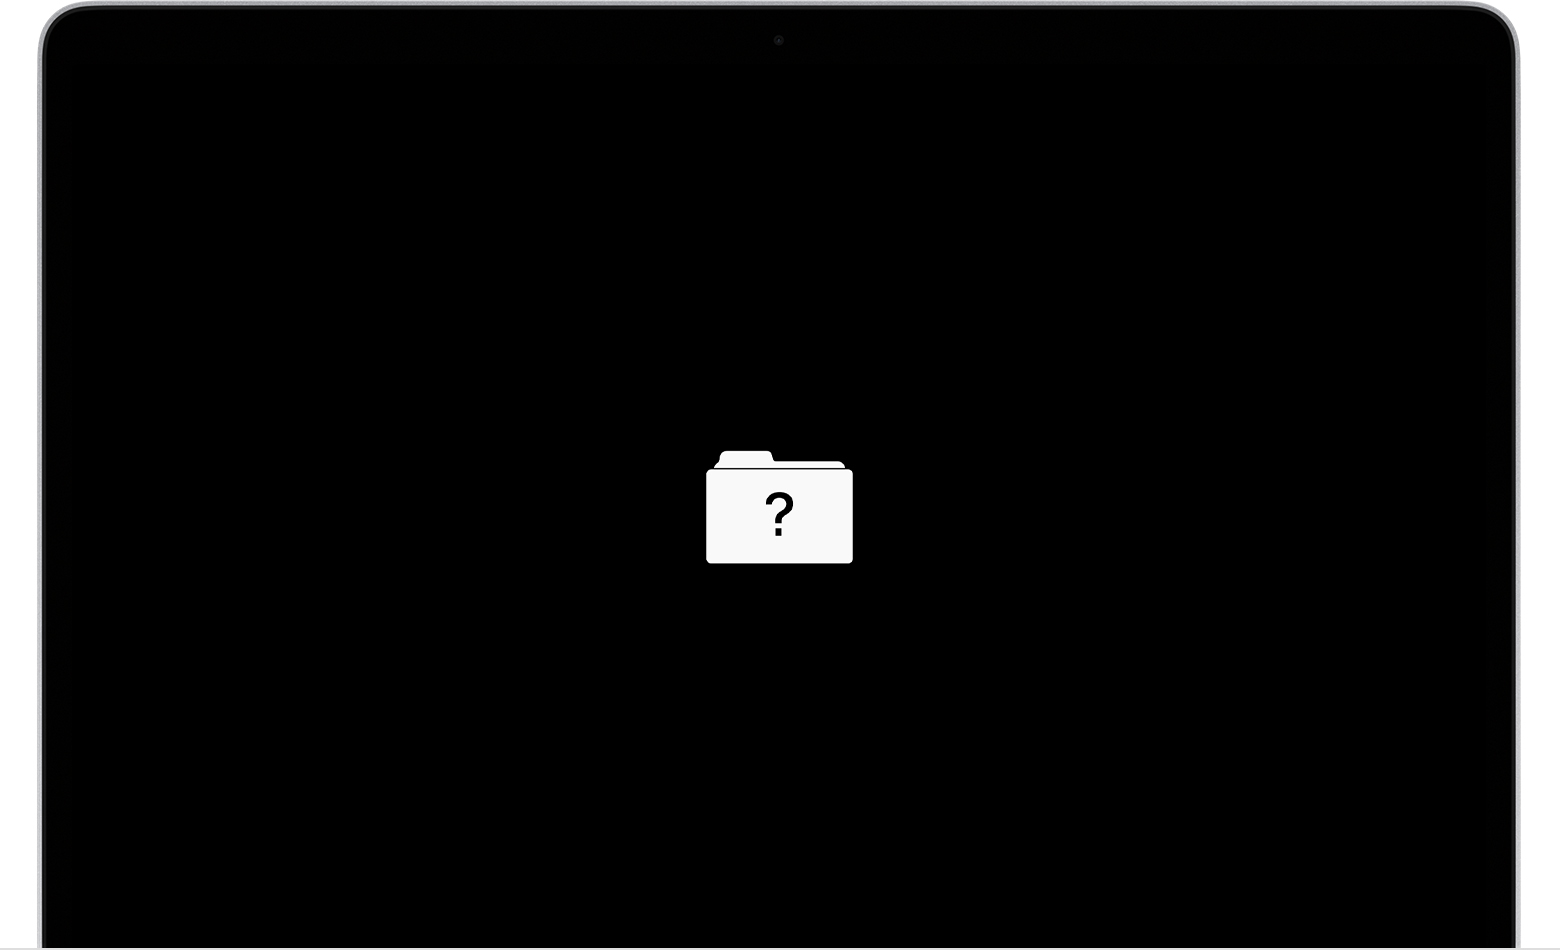
Your iMac is starting up, but instead of the Apple logo, you see a blinking folder with a question mark. Many users feel sudden panic when this icon appears. It often means your Mac can’t find its system software, so it doesn’t know how to start. The good news? This problem is common and can be fixed in most cases, even if you are not an expert. By understanding what this blinking folder means and following step-by-step solutions, you can often get your iMac running again—sometimes within minutes. Let’s explore what causes this issue, what steps to take, and how you can prevent it in the future.
What Does The Blinking Folder With A Question Mark Mean?
When your iMac shows a blinking folder with a question mark, it’s telling you that it can’t find a startup disk with a working macOS. The startup disk is the hard drive or SSD that contains the system files needed to boot your computer.
This symbol can appear for several reasons:
- The startup disk has failed or is missing.
- MacOS is corrupted or deleted.
- The startup disk is not selected or recognized.
- The disk’s connections are loose or damaged.
It is important to know that this is not always a sign of total hardware failure. Sometimes, it’s a simple software or settings issue.
Main Causes Of The Blinking Folder On Imac
Understanding the possible causes will help you troubleshoot better. Here are the most common reasons for seeing this icon:
- Disk Failure: The internal hard drive or SSD has stopped working or is not detected.
- Corrupted macOS: The system files needed to boot are damaged or missing.
- Startup Disk Not Selected: Your iMac can’t find which disk to use to start up.
- Loose or Damaged Cables: Internal cables connecting the disk to the motherboard may be loose or broken.
- Recent macOS Update Gone Wrong: Sometimes, a failed update can make the system unbootable.
- File System Errors: Errors in the disk’s file structure prevent macOS from loading.
Many users think it’s only a hardware problem, but software issues are very common, especially after updates or changes in settings.
Immediate Steps When You See The Blinking Folder
When you first see the blinking folder, don’t panic. Here are the steps to take right away:
- Restart Your iMac: Sometimes, a simple restart helps the computer find the correct disk.
- Check for External Drives: Disconnect any USB drives or external hard disks. Sometimes your Mac tries to boot from them.
- Listen for Noises: Unusual clicking or grinding sounds can mean a physical disk problem.
- Note Any Recent Changes: Did you update macOS, install new software, or open the case recently?
These simple checks can save time before you start deeper troubleshooting.
How To Fix The Imac Blinking Folder Issue
Let’s go step by step through the most effective solutions. You don’t need to try every method—start from the top and move down until your iMac boots normally.
1. Select The Startup Disk In Recovery Mode
Sometimes, your iMac forgets which disk to use. Here’s how to reset it:
- Turn off your iMac completely.
- Turn it on and immediately hold Command (⌘) + R until you see the Apple logo or a spinning globe.
- The Mac will boot into macOS Recovery.
- In the menu bar, choose Apple Menu > Startup Disk.
- Select your internal disk (usually called Macintosh HD) and click Restart.
If your disk appears here, but was not selected, this step often solves the problem.
2. Use Disk Utility To Repair The Drive
If your disk is visible but not working, try repairing it:
- In macOS Recovery, select Disk Utility.
- Find your internal disk in the left sidebar.
- Click First Aid and let it scan and repair.
- If errors are fixed, restart your Mac.
Disk Utility can fix many file system issues that cause the blinking folder.
3. Reinstall Macos
If your disk is healthy but the system is corrupt, reinstalling macOS can help:
- In macOS Recovery, choose Reinstall macOS.
- Follow the instructions on screen.
- Your data may be safe, but it’s best to have a backup if possible.
This will install a fresh copy of macOS on your existing disk.
4. Reset Nvram/pram
These are small memory sections that store startup information. Resetting can solve disk recognition issues:
- Turn off your iMac.
- Turn it on and immediately hold Option + Command + P + R.
- Hold for 20 seconds, then release.
This resets startup settings to default.
5. Check Physical Connections
If you’re comfortable opening your iMac (older models), check the cables:
- Disconnect power.
- Open the case carefully.
- Gently press on the drive’s data and power cables.
- Reassemble and try again.
Loose connections are common after moving or servicing the machine.
6. Try Internet Recovery
If local Recovery is missing, use Internet Recovery:
- Turn on your iMac and hold Command + Option + R.
- Connect to Wi-Fi if asked.
- Use the online tools to check or reinstall macOS.
7. Replace The Hard Drive Or Ssd
If none of the above work, the drive may be dead. You’ll need to:
- Buy a compatible replacement drive.
- Install it (or have a technician do it).
- Use Recovery to install macOS on the new drive.
Most Apple Stores and service centers can do this for you.
Comparing Solutions: Effectiveness And Difficulty
Here’s a comparison of the most common solutions you might try.
| Solution | Success Rate | Difficulty | Data Loss Risk |
|---|---|---|---|
| Select Startup Disk | High (if disk is healthy) | Easy | None |
| Disk Utility Repair | Medium | Moderate | Low |
| Reinstall macOS | High | Moderate | Medium |
| Replace Drive | High (if drive failed) | Hard | High |
If you care about keeping your data, always try disk repair and macOS reinstallation before replacing the hardware.
Data Recovery: Can You Get Your Files Back?
Many users worry about losing photos, documents, or work files. The chance of recovery depends on the problem:
- If the disk is healthy: Your files are usually safe. Disk Utility and Recovery Mode do not erase data.
- If the disk is failing: You might recover some data using special tools or services.
- If you reinstall macOS: Your files are often untouched unless you choose to erase the disk.
For extra safety, remove the disk and connect it as an external drive to another Mac. Use tools like Disk Drill or Data Rescue to recover files.
Diy Data Recovery Vs Professional Service
| Method | Cost | Success Rate | Best For |
|---|---|---|---|
| DIY Software | Low | Medium | Minor corruption, deleted files |
| Professional Service | High | High | Physical disk failure |
A non-obvious tip: If your iMac is under warranty, opening the case or removing the disk can void support. If you’re unsure, consult Apple Support first.
Common Mistakes To Avoid
Some solutions can make things worse. Here’s what not to do:
- Don’t erase the disk right away. This destroys all data. Only erase if you’re ready to lose everything.
- Don’t keep restarting endlessly. This can stress a failing disk and reduce recovery chances.
- Don’t ignore strange noises. Clicking or screeching sounds mean the disk may die soon.
- Don’t try random tools from the internet. Use only trusted recovery apps; many contain malware.
Another overlooked mistake: Forgetting to check for Time Machine backups. Even if your iMac’s drive is dead, your external backup may have all your files.
Preventing The Blinking Folder In The Future
After you fix your iMac, you can reduce the chance of this problem happening again:
- Keep regular backups: Use Time Machine or another backup tool. This is the best way to protect your files.
- Check disk health: Use Disk Utility’s “First Aid” every few months to spot problems early.
- Install macOS updates carefully: Make sure updates finish and don’t interrupt the process.
- Avoid sudden shutdowns: Always use the Apple menu to shut down or restart.
- Replace old disks: Hard drives often fail after 5–7 years. Upgrade to an SSD for better reliability.
Many users miss the fact that macOS gives early warning signs, like slow boots or random freezes. Don’t ignore these—run Disk Utility and back up your files right away.

Credit: www.youtube.com
When To Get Help From A Professional
Not every problem can be solved at home. Seek expert help if:
- Your disk does not appear in Disk Utility at all.
- The iMac makes clicking or grinding noises.
- Recovery Mode does not work or gives errors.
- You are not comfortable opening your iMac.
- Important business or personal files are at risk.
Apple’s authorized service providers have tools to diagnose and fix hardware problems. For more information, you can visit Apple’s official support page.
Advanced Troubleshooting: Terminal And Target Disk Mode
If the basic steps fail, advanced users can try these options.
Using Terminal In Recovery Mode
The Terminal app in Recovery Mode lets you run commands:
- Open Terminal from the Utilities menu.
- Use commands like `diskutil list` to show all connected disks.
- Try `diskutil mountDisk /dev/diskX` (replace X with your disk number) to force-mount the disk.
This can sometimes access a disk that doesn’t appear in Disk Utility.
Target Disk Mode
If you have another Mac and a Thunderbolt or FireWire cable:
- Turn off your iMac.
- Hold T while turning it on.
- Connect to another Mac—the iMac’s drive should appear as an external disk.
This lets you copy files off a damaged system. However, it only works if the disk is still partly functional.
Credit: www.salvagedata.com
Why Imacs Get The Blinking Folder More Often Than Macbooks
iMacs and MacBooks can both get the blinking folder, but iMacs may be at higher risk due to:
- Less frequent movement: Drives age silently, while MacBooks sometimes get checked or replaced after drops.
- Older hardware: Many iMacs in offices and homes are older models, still using mechanical hard drives.
- Heavier workloads: Desktop iMacs often run for longer periods, increasing wear.
Upgrading to an SSD is a smart investment for old iMacs. SSDs are much less likely to fail suddenly compared to spinning disks.
Should You Upgrade Your Startup Disk?
If your iMac is over 5 years old and you’re fixing a blinking folder issue, consider upgrading:
- SSDs are much faster and more reliable than hard drives.
- Boot times drop from minutes to seconds.
- Newer drives support features like TRIM, improving long-term performance.
Many users are surprised by how much faster their old iMac feels after an SSD upgrade. It’s often cheaper than buying a new Mac.
Timeline For Diagnosing And Fixing The Issue
People often ask, “How long will it take to fix my iMac?” Here’s a general guide:
| Step | Typical Time Needed |
|---|---|
| Restart and Check Cables | 5–10 minutes |
| Run Disk Utility / Recovery Mode | 15–30 minutes |
| Reinstall macOS | 30–90 minutes |
| Replace Disk & Restore Backup | 2–4 hours |
| Professional Data Recovery | 1–5 days |
Simple fixes often work in less than an hour. Hardware replacement or recovery takes longer.
Frequently Asked Questions
What Is The Main Reason For The Blinking Folder With A Question Mark On Imac?
The blinking folder with a question mark means your iMac can’t find a startup disk with working macOS. This can be from a failing disk, corrupted system, or incorrect settings.
Will I Lose All My Files If I See This Icon?
Not always. If your disk is still healthy, your files are usually safe. Avoid erasing or formatting the disk until you’ve tried recovery steps. Use Disk Utility or connect the disk to another Mac if you need to recover data.
How Can I Prevent This Problem From Happening Again?
Regularly back up with Time Machine, check your disk health, and replace old drives every few years. Don’t ignore slow performance or strange noises—these are early warning signs.
Can I Fix The Blinking Folder Problem Myself, Or Do I Need A Technician?
Many users can fix this at home by selecting the startup disk or reinstalling macOS. But if the drive is not detected, makes noise, or you are unsure, it’s safer to get professional help.
Does Upgrading To An Ssd Help Prevent The Blinking Folder Issue?
Yes. SSDs are much more reliable than older hard drives and are less likely to fail suddenly. Upgrading is a smart way to reduce the risk of this problem in the future.
If you follow the steps above, you can often recover your iMac without losing your files. For more complex issues, don’t hesitate to reach out to Apple Support or a trusted service provider. Your data is important—take action early, and your iMac can stay healthy for years to come.

Credit: www.yellowbrickdatarecovery.com