
Many people invest in a Weboost signal booster expecting stronger cellular reception and fewer dropped calls. But sometimes, the device displays blinking lights, leaving users confused and frustrated. If you own a Weboost and notice unusual blinking, you’re not alone. These lights are not just for decoration—they’re your device’s way of telling you something important. Understanding them can help you fix problems faster, keep your booster working well, and avoid unnecessary support calls.
This article explains everything you need to know about Weboost blinking lights. You’ll learn why they happen, what each color and pattern means, and how to solve common issues. We’ll also cover tips for installation, troubleshooting steps, and a few advanced solutions if things get tricky. Whether you’re a homeowner, RV traveler, or business user, this guide will help you get the best from your Weboost system.
What Are Weboost Blinking Lights?
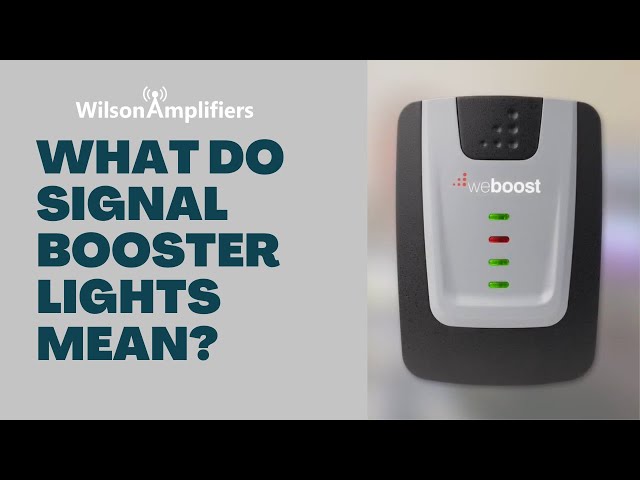
Weboost signal boosters use indicator lights to show their status. These lights change color and blink in different patterns to communicate issues or normal operation. Most models, like the Weboost Home MultiRoom or Drive Reach, have LEDs labeled for each frequency band (such as 700 MHz, 850 MHz, 1900 MHz) and sometimes a power or system light.
Blinking lights are a kind of warning or alert. Instead of a simple green (good) or red (bad), blinking adds more detail:
- Flashing green: Usually means the booster is working, but with reduced power.
- Flashing red or orange: Often signals a problem, like interference or overload.
- Alternating patterns: May indicate more complex issues.
Knowing these signals can help you react quickly and keep your booster running smoothly.
Why Do Blinking Lights Matter?
Ignoring these signals can lead to poor performance, weak coverage, or even equipment damage. Blinking lights are a built-in diagnostic tool. They help you identify:
- Oscillation (feedback between antennas)
- Overload (too strong a signal from outside)
- Installation errors
- Hardware faults
Fixing issues early ensures your booster stays safe and delivers the best possible signal.
Common Weboost Light Patterns And Their Meanings
All Weboost models have LED indicators, but the exact light patterns can vary. The most common patterns include:
Solid Green
A solid green light is the best sign. It means the booster is on and working as it should. You don’t need to do anything.
Blinking Green
A blinking green light usually means the booster is reducing power to avoid interference or feedback (oscillation). This is a self-protection feature. Your booster still works, but its range or power is slightly lower.
Solid Red
A solid red light means the booster has shut down that band because of a problem, such as strong interference, oscillation, or overload. You may have coverage gaps.
Blinking Red
Blinking red is a more urgent warning. It usually means continuous oscillation or overload that the booster can’t fix itself. This needs attention right away.
Alternating Red And Green
Some models show alternating red and green to signal a system error or a hardware malfunction. This is less common but usually means you should check connections or contact support.
Below is a summary for quick reference:
| Light Pattern | Meaning | Action Needed? |
|---|---|---|
| Solid Green | Normal operation | No |
| Blinking Green | Reduced power/oscillation fix | Check antenna placement |
| Solid Red | Shutdown due to fault | Yes |
| Blinking Red | Serious fault/oscillation | Yes, immediate |
| Red-Green Alternating | System/hardware error | Check device or call support |
Credit: www.youtube.com
Why Do Weboost Lights Blink? Main Causes
If you notice blinking lights on your Weboost, the device is trying to protect itself or tell you about a problem. The most common causes are:
1. Oscillation
Oscillation is like feedback in a microphone—when the outdoor antenna and indoor antenna are too close, the boosted signal loops back into the system. Weboost detects this and lowers power or shuts down the affected band to prevent damage.
Symptoms: Blinking green or red, sometimes one band goes off.
How to solve: Increase the distance between indoor and outdoor antennas. Place them on opposite sides of a wall or use more vertical space.
2. Overload
If your outdoor antenna picks up a very strong cell signal (for example, if you’re very close to a tower), the booster can be overloaded. This can cause solid or blinking red lights.
Symptoms: All bands or one band shows red/blinking red.
How to solve: Reposition the outdoor antenna so it points away from the tower or use an attenuator.
3. Installation Errors
Loose cables, wrong antenna placement, or using the wrong type of cable can cause errors. The booster may blink to alert you.
Symptoms: Random blinking, sometimes all lights.
How to solve: Check all connections, tighten cables, and make sure antennas are correctly installed.
4. Hardware Faults
Rarely, a hardware problem inside the booster can cause blinking lights, especially alternating red/green patterns. This is less common but possible.
Symptoms: All lights show strange patterns, booster doesn’t work at all.
How to solve: Try a power cycle. If it continues, contact Weboost support.
5. Weather Or Power Issues
Power surges or lightning can affect the booster. Sometimes, cold or heat can trigger protection mode.
Symptoms: Random blinking, sometimes after storms.
How to solve: Unplug and restart. Use a surge protector.
Step-by-step Troubleshooting For Blinking Lights
If your Weboost is blinking, don’t panic. Most issues can be solved with a few steps. Here’s a practical process to follow:
1. Identify The Pattern
Check which light is blinking (green or red), how fast, and if it’s steady or alternating. This tells you the type of problem.
2. Power Cycle The Booster
Unplug the booster from power, wait 30 seconds, then plug it back in. Sometimes a simple reset clears minor errors.
3. Check Antenna Separation
- Measure the distance between outdoor and indoor antennas.
- For homes, try to keep them at least 20 feet apart horizontally or 15 feet vertically.
- For vehicles, increase space as much as the vehicle allows.
4. Inspect Cables And Connections
- Make sure all cables are tight and properly connected.
- Look for damaged or bent connectors.
- Replace any faulty cables.
5. Reposition The Outdoor Antenna
- If you suspect overload, move the outdoor antenna away from the cell tower.
- Try pointing it in a slightly different direction.
- Avoid placing it near metal objects.
6. Reduce Signal Gain (if Possible)
Some Weboost models have manual gain controls. Lower the gain slightly on the affected band to reduce oscillation or overload.
7. Check For Environmental Interference
- Move the booster away from large metal surfaces or electronics.
- Avoid placing antennas behind TVs or near microwaves.
8. Test After Each Step
After each change, wait a few minutes to see if the lights return to solid green. If not, try the next step.
9. Reset To Factory Settings
Some models allow a factory reset. Check your manual for instructions. This can clear stubborn errors.
10. Contact Weboost Support
If nothing works, reach out to Weboost customer service. Have your model number, purchase date, and a description of the problem ready.

Credit: wilsonamplifiers.ca
Case Studies: Real-world Examples
Seeing how others solved blinking light issues can give you confidence. Here are three real scenarios:
Case 1: Home Multiroom Oscillation
A family installed a Weboost Home MultiRoom. After setup, the 700 MHz light blinked green. They found their indoor antenna was only 10 feet from the outdoor unit, separated by a thin wall. Moving the indoor antenna to a far room stopped the blinking, and the light turned solid green.
Insight: Even a thin wall is not enough. Real separation matters.
Case 2: Rv Overload Issue
An RV owner parked near a cell tower. The booster’s lights turned solid red. By pointing the outdoor antenna away from the tower and slightly lowering the gain, the lights returned to green. The signal inside was still strong.
Insight: Too much signal can be as bad as too little.
Case 3: Hardware Glitch
A business user saw alternating red/green lights after a power outage. A power cycle didn’t help. Weboost support found a damaged power supply. Replacing it fixed the issue.
Insight: Power surges can cause hardware issues, not just wiring problems.
Weboost Blinking Lights: Model Differences
Not all Weboost boosters are the same. Light patterns and their meanings can change by model. Below is a quick comparison of popular Weboost models:
| Model | LED Light Colors | Manual Gain Control | Special Notes |
|---|---|---|---|
| Drive Reach | Red, Green | No | Automatic gain; simple signals |
| Home MultiRoom | Red, Green | No | Separate band lights |
| Connect 4G-X | Red, Green | Yes | More manual control |
| Office 100 | Red, Green | Yes | For larger spaces |
Tip: Always check your model’s user manual for exact light codes. A pattern on one model may mean something slightly different on another.
Preventing Weboost Blinking Light Issues
Prevention is better than cure. If you want to avoid blinking light problems, follow these installation and maintenance tips:
Best Practices For Antenna Placement
- Always maximize the distance between indoor and outdoor antennas.
- Use walls, floors, or ceilings to create physical barriers.
- For multi-story homes, place one antenna upstairs and the other downstairs.
Use Quality Cables
- Use the cables supplied by Weboost or high-quality RG6/RG11 cables.
- Avoid sharp bends and cable runs near high-power devices.
Protect From Power Surges
- Use a surge protector or uninterruptible power supply (UPS).
- Unplug the booster during thunderstorms if possible.
Regular Maintenance
- Check cable connections every few months.
- Inspect for visible damage or corrosion, especially in outdoor installations.
Software/firmware Updates
Some advanced models may allow updates. Check the Weboost website for any firmware improvements that enhance reliability.
When To Call For Professional Help
Most blinking light issues can be fixed at home. However, call a professional if:
- You see alternating red/green lights after trying all troubleshooting steps.
- Your coverage does not improve after fixing blinking lights.
- You suspect hardware damage (burnt smell, visible breaks).
- Your booster is still under warranty (don’t risk voiding it).
Expert installers can test signal levels, check for interference, and recommend the best antenna positions.

Credit: www.youtube.com
Advanced Troubleshooting Tips
If you’re comfortable with technical steps, try these advanced fixes:
Use A Signal Meter
A signal meter helps you find the strongest, cleanest signal for your outdoor antenna. Place your antenna where the meter shows the best numbers—this can reduce overload and oscillation.
Add An Attenuator
If your outdoor signal is too strong, an attenuator can “turn down” the signal before it enters the booster. These are small devices that install between the antenna and booster.
Upgrade Antennas
Sometimes, changing to a directional outdoor antenna or a different style of indoor antenna can fix persistent blinking issues.
Shielding
For very tough oscillation problems, add shielding (metal plates or special paint) between antennas. This is rare but sometimes needed in challenging buildings.
Comparing Weboost To Other Brands
Weboost is a leading brand, but other boosters like SureCall and HiBoost also use blinking lights. Here’s a quick comparison:
| Brand | Light Indicators | Oscillation Handling | User Friendliness |
|---|---|---|---|
| Weboost | Blinking green/red | Auto shutdown, alerts | Very high |
| SureCall | Blinking lights, LCD | Manual/auto | High |
| HiBoost | Color LEDs, app | App alerts, auto | Medium-high |
Weboost stands out for its simple, clear light patterns and strong customer support. SureCall and HiBoost may offer extra features, but their troubleshooting can be less intuitive for beginners.
Two Insights Most Users Miss
- Antenna separation is more important than signal strength. Many users focus on getting the “strongest” outside signal, but if antennas are too close, the booster reduces power or shuts down—leading to blinking lights. Maximum separation nearly always solves more problems than buying a bigger antenna.
- Solid red does not always mean equipment failure. Often, a solid red light just means overload or oscillation protection is active. It can be fixed with better antenna placement, not a new booster.
Final Thoughts
Weboost blinking lights are not just annoying—they’re valuable clues. By learning what each pattern means, you can quickly diagnose and fix most issues. Good installation, regular checks, and smart troubleshooting will keep your booster working for years. If you ever get stuck, the company’s support or a professional installer can help. For more details, you can visit the official Weboost light guide.
Frequently Asked Questions
What Should I Do If My Weboost Blinks Red After Installation?
First, check that your indoor and outdoor antennas are far enough apart. If they are too close, move one farther away. Also, check all cables and try power cycling the device.
How Far Apart Should Weboost Antennas Be To Avoid Blinking Lights?
For homes, aim for at least 20 feet horizontally or 15 feet vertically. In vehicles, use as much space as possible. More separation is always better.
Can Weather Cause Weboost Lights To Blink?
Yes, lightning or power surges can cause temporary errors. Unplug the booster during storms and use a surge protector to prevent damage.
Is Blinking Green Normal On My Weboost?
A blinking green light means the booster is reducing power to fix minor oscillation. It’s not dangerous, but you should improve antenna separation for best performance.
Will A Firmware Update Fix Blinking Light Issues?
Sometimes, but not always. Check your model for available updates, but physical installation and antenna placement are the most common solutions for blinking lights.