
The red blinking light on the Nintendo Entertainment System (NES) is a sight that every classic gamer knows too well. You’re ready to enjoy your favorite retro game, but instead of the start screen, you get a flashing red power light and a blank or flickering display.
This problem became so common that it’s sometimes called the “Blinking Red Light of Death. ” But what actually causes it? Can you fix it yourself? And what can you do to prevent it from happening again? Let’s dive deep into the real causes, fixes, and myths around the NES blinking red light issue.
What Is The Nes Blinking Red Light Problem?
When you turn on your NES, the power indicator should stay solid red. If it blinks on and off, the console isn’t working properly. Often, the TV screen will also flicker, show a gray or black screen, or display a scrambled image. Sometimes, the game won’t start at all.
This blinking is not just a random error. The NES was designed with a lockout chip for security. If the console thinks the game cartridge isn’t making a good connection, the lockout chip will reset the system again and again. That’s why you see the red light blinking.
Main Causes Of The Nes Blinking Red Light
Many people believe the blinking means the console is broken. In reality, it’s usually a sign of a connection problem between the game cartridge and the NES itself. Let’s look at the top reasons this happens:
1. Dirty Or Corroded Cartridge Contacts
Dust, dirt, or corrosion on the metal contacts of the game cartridge can stop the signal from passing correctly.
2. Worn Or Bent 72-pin Connector
Inside every NES is a 72-pin connector that holds the cartridge. Over time, the pins can bend, wear out, or lose their grip.
3. Faulty Or Dirty Lockout Chip
The 10NES lockout chip checks if the game is authentic. If it malfunctions or gets dirty, it may force the blinking light.
4. Power Issues
A weak or failing power supply, or bad connections at the power port, can trigger the blinking.
5. Motherboard Problems
In rare cases, the NES’s motherboard might have cold solder joints or damaged traces.
Many of these problems are fixable at home, but a few need professional attention.
How To Fix The Nes Blinking Red Light
If you want to get your NES working again, follow these steps, starting with the simplest fixes first.
1. Clean The Cartridge And Connector
The most common cause is dirty contacts. You’ll need:
- Isopropyl alcohol (at least 70%)
- Q-tips or cotton swabs
- A soft cloth
Steps:
- Dip a Q-tip in alcohol and gently rub the metal contacts of the game cartridge.
- Repeat until the swab comes out clean.
- Wipe dry with a soft cloth.
- Insert and remove the cartridge several times to help clean the NES connector.
For even better results, you can use a cleaning kit designed for NES connectors, but be gentle—don’t force anything.
2. Check And Clean The 72-pin Connector
If cleaning the cartridge doesn’t work, the problem may be in the NES’s 72-pin connector. Over decades, these pins can lose tension and not grip the game correctly.
- Remove the NES case (you’ll need a Phillips screwdriver).
- Locate the connector where the game cartridge slides in.
- Clean the pins with alcohol and a thin brush.
- Gently bend the pins back into place with a small tool, if needed.
If the connector is too worn, you can buy a replacement online and swap it out. This often fixes the blinking issue for good.
3. Power Supply And Connections
Sometimes, the power supply is the problem. Try these:
- Use the original NES power adapter if possible.
- Check the power port for loose connections.
- If you have another compatible adapter, test with that.
If the light stays solid red, you’ve found the problem.
4. Address The Lockout Chip
The lockout chip can be disabled, but this is an advanced repair. Some people “clip pin 4” on the 10NES chip inside the console. This stops the security check and the blinking light, but you should only do this if you’re comfortable with soldering and electronics.
A safer method is to keep your cartridges and connectors clean and use reliable games.
5. Check The Motherboard
If all else fails, the problem may be with the NES’s main board. Cold solder joints or damaged traces are rare, but possible. If you see obvious damage, you may need to take it to a retro repair shop.
Common Myths About The Nes Blinking Red Light
The NES blinking red light has inspired many DIY tricks and myths over the years. Let’s clear up a few:
- Blowing into cartridges helps: This is the most famous trick, but it’s actually harmful. Your breath contains moisture, which can corrode the metal over time.
- Pressing the reset button multiple times: This does not fix the problem. It just resets the system.
- Every blinking light means the NES is broken: Most of the time, the console is fine. The issue is usually with the cartridge or connector.
Nes Model Differences And The Blinking Red Light
Not all NES consoles have the same blinking light issue. Here’s a quick comparison of different models and their lockout systems:
| Model | Lockout Chip | Blinking Light Issue |
|---|---|---|
| NES Front Loader (USA) | 10NES (yes) | Common |
| NES Top Loader (USA) | 10NES (no) | Rare |
| Famicom (Japan) | 10NES (no) | Never |
The original front-loading NES is famous for the blinking light problem. The later top-loading model removed the lockout chip, so it almost never blinks.
How The Nes Lockout Chip Works
The lockout chip, or 10NES, was Nintendo’s way to prevent unlicensed games. It checks if the game cartridge has a matching chip before the NES starts up. If it doesn’t, or if the connection is bad, the chip resets the system—causing the light to blink.
This system was easy to defeat with a physical mod, which is why later NES models dropped the chip.
Simple Ways To Prevent The Blinking Red Light
You can avoid the blinking red light with a few simple habits:
- Store games properly: Keep cartridges in cases and away from dust.
- Clean contacts regularly: Use isopropyl alcohol, not water or saliva.
- Insert cartridges straight: Don’t force or wiggle them.
- Use a dust cover: Many NES consoles came with a plastic door—keep it closed when not in use.
- Avoid third-party cartridges: These are more likely to cause connection problems.
Repair Vs. Replacement: Which Is Better?
If your NES blinks red after cleaning and checking connections, you have two main choices: fix the console or replace it.
| Option | Pros | Cons |
|---|---|---|
| Repair (replace 72-pin connector) | Cheap, keeps original hardware | Requires tools, some skill |
| Buy a Top Loader NES | More reliable, no blinking issue | Expensive, less common |
For most fans, replacing the 72-pin connector is the best balance of price and original feel. Top loader models are more reliable but cost more, especially for collectors.
The Nes Blinking Red Light In Pop Culture
The blinking light is more than a technical glitch—it’s part of gaming history. Many people remember the ritual of cleaning cartridges, blowing into them, and trying again and again to get the game to start. The blinking red light has become a symbol of both frustration and nostalgia for the 1980s and 90s generation.
Some modern game systems even joke about the “blinking light” in their error messages, showing how deeply it’s entered gaming culture.
Non-obvious Insights Most Beginners Miss
- The NES was designed to mimic a VCR, not a traditional game console.
The front-loading design was new and “cool” in the 1980s, but this made the 72-pin connector weaker over time compared to top-loading designs.
2. High Humidity Can Make The Blinking Problem Worse.
If you store your NES in a basement or damp room, the connector pins can corrode faster. Keeping your console in a dry area can prevent many problems.

Credit: retrogamestart.com
When To Seek Professional Help
If you’ve cleaned your games and connector, checked the power supply, and still see the blinking red light, it might be time to ask for help. Professional repair shops can:
- Replace the 72-pin connector with high-quality parts
- Disable or repair the lockout chip
- Fix motherboard issues
Prices can vary, but basic repairs are usually affordable for such a classic system.
Nes Blinking Red Light Vs. Other Console Issues
It’s easy to confuse the NES blinking red light with other console problems, like:
- No power at all: Usually a dead adapter or broken power port.
- Solid red light, but no video: May be a cable issue or TV setting.
- Game freezes after starting: Can be a dirty cartridge, but also a sign of a damaged motherboard or bad game chip.
Here’s a quick comparison:
| Problem | Likely Cause | Fix |
|---|---|---|
| Blinking red light | Bad connection, lockout chip | Clean contacts, replace 72-pin |
| No power | Adapter, fuse, port | Test/replace adapter |
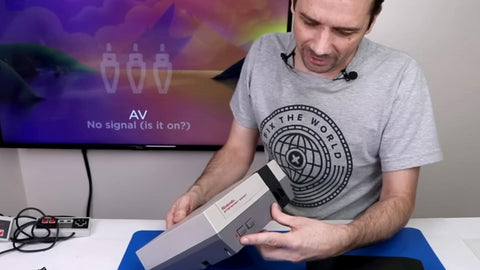
| Solid red, no video | AV cable, TV input | Check cables/TV |
Credit: tronicsfix.com
Why Does The Nes Blinking Red Light Still Matter Today?
Retro gaming is more popular than ever. Many collectors and gamers still use the original NES hardware. Understanding the blinking red light helps keep these old consoles running for years to come. It’s also a valuable lesson in how even simple hardware can have unique quirks.
If you want to learn more about the NES’s history and technology, a good place to start is the Nintendo Entertainment System Wikipedia page.
Frequently Asked Questions
Why Does Blowing Into Nes Cartridges Not Work?
Blowing into cartridges might seem to work, but it actually adds moisture, which can corrode the contacts over time. A better solution is to clean with isopropyl alcohol and a soft cloth.
Can I Remove The Nes Lockout Chip To Stop The Blinking Light?
Yes, removing or disabling the lockout chip will stop the NES from blinking. However, this is a hardware modification and can be risky if you’re not experienced with electronics.
Are Replacement 72-pin Connectors Reliable?
Modern replacement connectors are usually reliable, but some cheap versions grip too tightly or wear out fast. Look for high-quality parts and avoid forcing cartridges into place.
Will The Nes Classic Edition Have The Blinking Red Light Problem?
No, the NES Classic Edition is a modern mini-console with HDMI and does not use cartridges or a lockout chip. The blinking red light issue only affects original NES hardware.
How Often Should I Clean My Nes And Cartridges?
It’s a good idea to clean your cartridges every few months if you play often, and your NES connector once or twice a year. Store everything in a dry, dust-free place for best results.
conclusion
The NES blinking red light may be a classic problem, but with a bit of care and knowledge, you can keep your favorite retro system running smoothly for many more years.

Credit: www.youtube.com