
If you see a Genie garage door sensor blinking red, you may feel frustrated or even a little worried. Is your garage door broken? Will you have to pay for expensive repairs? Before you call a technician or buy new parts, it’s smart to understand what this blinking red light means and how you can fix it yourself. Many times, the solution is simpler than you think.
Garage door sensors are a key part of your safety system. They prevent the heavy door from closing on people, pets, or objects. These sensors use an invisible light beam across the bottom of your garage door. If something blocks this beam, the sensors tell the motor to stop or reverse the door.
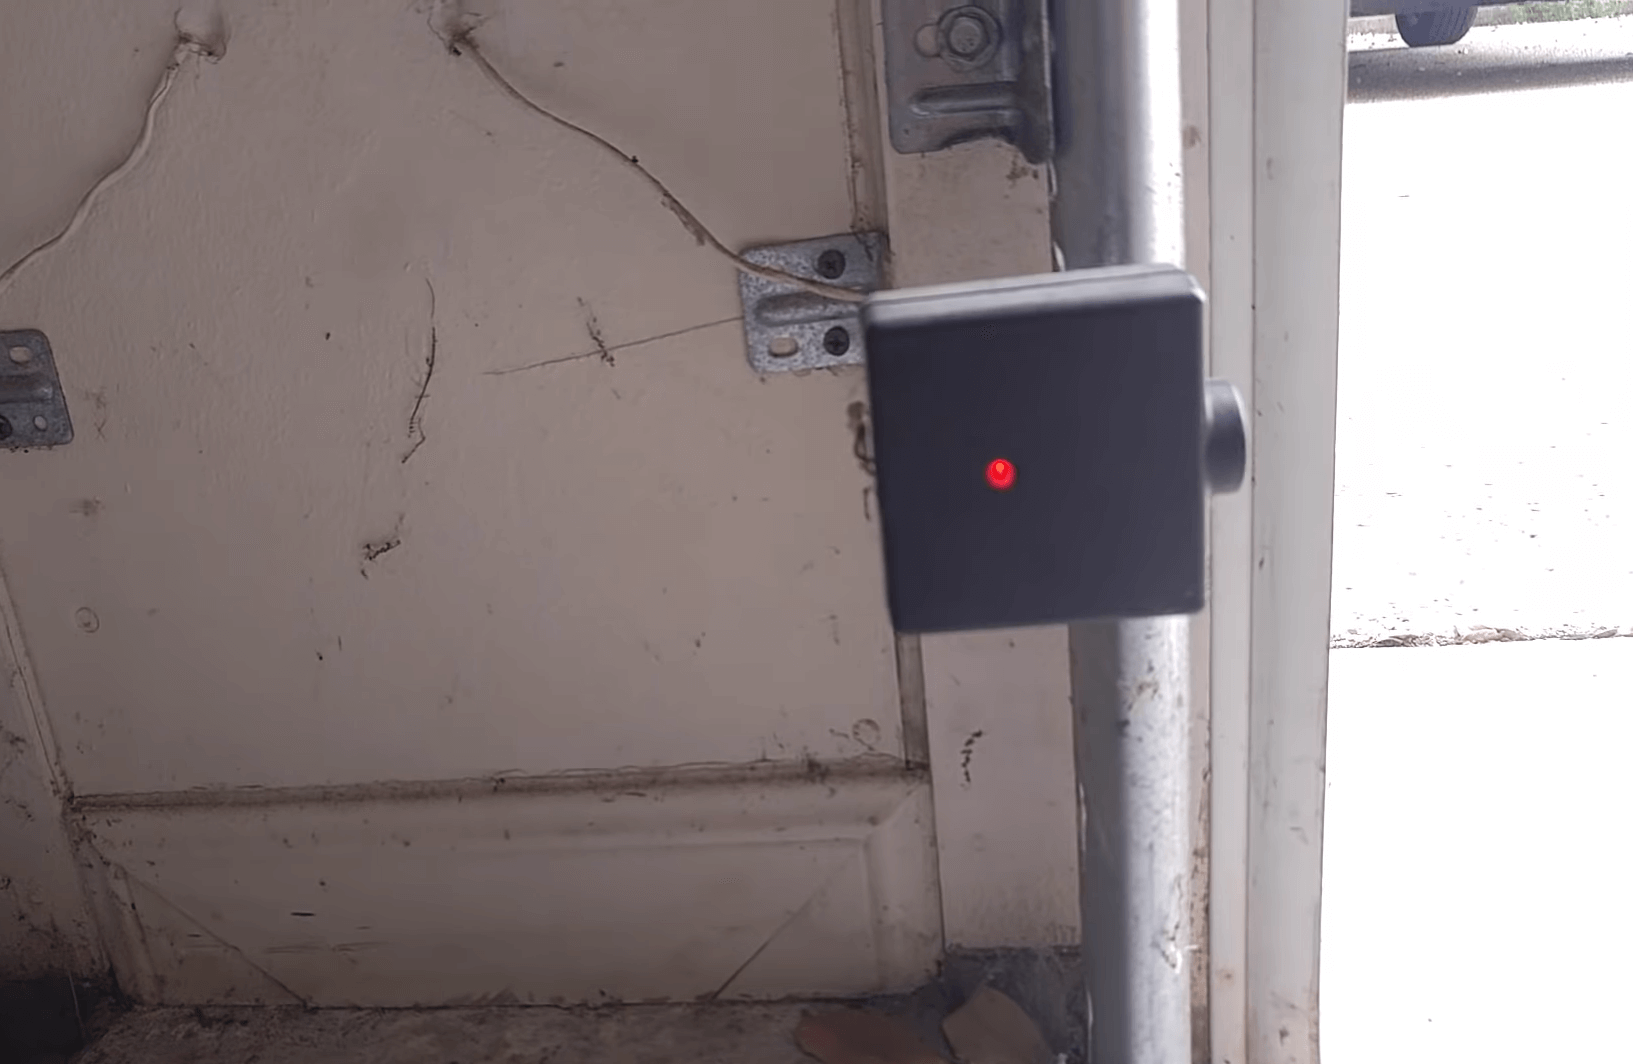
When everything works, the sensor shows a steady green or red light. But if there’s a problem, that light often starts blinking red.
Let’s explore what causes a Genie garage door sensor to blink red, how to troubleshoot the issue, and what steps you can take to get your garage door working smoothly again. You’ll also learn some tips to prevent future problems, and how to know when it’s time to call a professional.
What Does The Blinking Red Light Mean?
When you see a blinking red light on your Genie garage door sensor, it’s a warning sign. This light is not just a random signal—it’s your garage door’s way of telling you something is wrong. The most common reasons for a blinking red sensor are:
- Blocked sensor beam
- Misalignment
- Dirty sensor lens
- Loose wiring
- Sensor failure
In most cases, the issue is minor and can be fixed without special tools. The red blinking light means the sensor is not getting a clear signal from its partner sensor on the other side of the garage door. This could be because something is in the way, the sensors are not lined up, or there’s an electrical problem.
Understanding Genie Garage Door Sensors
To fix a problem, it helps to understand how the system works. Genie garage door openers use a pair of photoelectric sensors—sometimes called “safety eyes.” One sensor sends an infrared beam, and the other receives it. Both are usually located about six inches above the floor, on each side of the garage door opening.
When the sensors are working, you’ll see a solid light (red or green, depending on the model). If the beam is broken, blocked, or the sensors aren’t communicating, the light blinks red. Some Genie models use one green sender and one red receiver; in others, both lights may be red.
How The Sensor System Protects You
The sensors are a safety feature required by law. If a person, pet, or object is in the way, the sensors tell the opener to stop or reverse. This prevents injuries and damage. If the sensors don’t work, the door usually won’t close from the remote or keypad.
You can override the system with the wall button (holding it down), but this is not a permanent solution.
Common Symptoms Besides Blinking Red
A blinking red light is not the only sign of sensor problems. You may also notice:
- The door won’t close with the remote or keypad
- The door starts to close, then reverses
- The wall button works only if held down
- The opener makes clicking or beeping sounds
These signs, together with a blinking red sensor, point to a sensor issue.
Step-by-step Troubleshooting Guide
Let’s walk through the most effective steps for fixing a Genie garage door sensor blinking red. You don’t need advanced technical skills—just some patience and careful observation.
1. Check For Obstructions
The most common reason for a blinking red sensor is something blocking the beam.
- Look for boxes, tools, bikes, or even spider webs in front of the sensors.
- Clear away any objects near the bottom of the door track.
- Remove dust, cobwebs, or leaves from the sensor lens using a soft cloth.
Non-obvious tip: Even small insects or thick dust can break the beam and cause a blinking red light.
2. Inspect Sensor Alignment
Genie sensors need to point exactly at each other. If one gets bumped or moved, the beam is lost.
- Stand behind each sensor and look straight at the other. You should see the light on both sensors.
- If one sensor is angled up, down, or sideways, gently adjust it until the light becomes solid.
- Tighten the mounting brackets if they’re loose.
Practical insight: Temperature changes can warp metal brackets, slowly misaligning sensors over time—so check alignment even if you haven’t hit them.
3. Clean The Sensor Lenses
Dirt, moisture, or even foggy residue can block the infrared beam.
- Use a soft, dry cloth to wipe both sensor lenses.
- Do not use water or harsh cleaners; these can damage the lens.
- If the lens is scratched, gently polish with a microfiber cloth.
Beginner mistake: Ignoring sensor cleaning for years. Regular cleaning can prevent most blinking red issues.
4. Check Sensor Wiring
Loose or damaged wires can cause the sensors to lose power or connection.
- Follow the wires from each sensor to the opener unit.
- Make sure wires are not cut, frayed, or chewed (rodents sometimes chew on them).
- Confirm that the wire connectors at the sensor and opener are tight.
Advanced tip: If you have a multimeter, test for voltage at each sensor. Most Genie sensors use low-voltage (about 24V DC).
5. Look For Sunlight Interference
Direct sunlight can sometimes confuse the infrared sensor, especially at certain times of day.
- If the blinking red light happens only when the sun hits the sensor, try shading it with a small piece of cardboard.
- Move the sensor slightly if possible to reduce direct sunlight.
Not obvious: Sunlight interference often causes intermittent issues—pay attention to the time of day when problems happen.
6. Reset The Opener
If you’ve checked everything and the red light still blinks, try resetting the garage door opener.
- Unplug the power to the opener for 30 seconds.
- Plug it back in and check the sensors again.
- Sometimes, a power reset clears minor glitches.
7. Test The System
After each fix, test the garage door.
- Use the remote or keypad to close the door.
- If the sensor light is solid, the problem should be fixed.
- If the light still blinks, continue troubleshooting.
8. Replace The Sensor (if Needed)
If all else fails, the sensor may be faulty.
- Purchase a replacement Genie sensor compatible with your opener model.
- Disconnect the old sensor and wire in the new one (match wire colors).
- Mount the new sensor and align as before.
Expert tip: Replace both sensors as a pair for best results. Old and new sensors may not always work well together.
Genie Sensor Light Signals: What They Mean
Genie garage door openers use different light signals to communicate. Here’s a quick guide:
| Sensor Light | Meaning | Action Needed |
|---|---|---|
| Solid Red or Green | Normal operation | None |
| Blinking Red | Misaligned, blocked, or faulty sensor | Troubleshoot as above |
| No Light | No power or wiring issue | Check wiring, power, replace if needed |
If you see a pattern of fast or slow blinking, check your Genie manual—some models use different blink codes.
Credit: mygarageblog.com
When To Call A Professional
Most sensor problems can be fixed at home. But sometimes, you need expert help.
Call a technician if:
- The sensor wiring is damaged inside the wall.
- The opener shows error codes you can’t identify.
- The sensors stay blinking red after all troubleshooting steps.
- The door does not move even with the wall button.
Garage door technicians have special tools and experience. They can fix electrical issues, replace sensors, and test the safety system.
Preventing Future Sensor Problems
You can avoid many sensor issues with simple habits:
- Clean the sensors every few months.
- Don’t store items near the door tracks.
- Check alignment after storms or if the door is hit.
- Watch for signs of wire damage (especially if you have pets or rodents).
Pro tip: Once a year, test the safety system. Place a roll of paper towels in the door’s path and try to close the door. The door should reverse immediately.
Genie Vs. Other Garage Door Sensors
How does Genie compare to other major brands in terms of sensor issues? Here’s a quick comparison:
| Brand | Sensor Light Color | Common Issues | Average Cost to Replace |
|---|---|---|---|
| Genie | Red/Green | Misalignment, dust, wiring | $20–$40 |
| Chamberlain/LiftMaster | Green/Yellow | Sunlight, wiring, alignment | $25–$45 |
| Craftsman | Red | Obstruction, sensor failure | $20–$40 |
Observation: Genie sensors are not more likely to fail than others. Most brands use similar technology, so the same troubleshooting steps apply.
Real-world Example: A Homeowner’s Story
John, a homeowner in Ohio, noticed his Genie garage door wouldn’t close with the remote. The sensor showed a blinking red light. He checked for obstructions—nothing. After cleaning the lens and realigning the sensors, the red light stayed solid and the door worked.
A month later, the problem returned, but only in the afternoon. John realized sunlight was hitting the sensor. He shaded it with a small piece of cardboard, and the problem stopped.
Key lesson: Sometimes, the problem is not obvious. Pay attention to when and how the issue happens.
Cost Of Fixing A Blinking Red Sensor
You may wonder if fixing the sensor will be expensive. Here’s a breakdown of typical costs:
| Fix | DIY Cost | Pro Cost |
|---|---|---|
| Cleaning/Aligning | $0 (just your time) | $50–$100 (service call) |
| Replacing Sensor | $20–$40 (per pair) | $100–$150 (parts + labor) |
| Wiring Repair | $5–$15 (wire & connectors) | $100–$200 (if inside wall) |
Tip: Try all simple fixes before calling a pro. Most sensor problems cost little to repair.
Advanced Troubleshooting: Multimeter Testing
If you have basic electrical skills, a multimeter can help find wiring problems.
- Set the meter to DC voltage.
- Touch the probes to the sensor wire terminals.
- You should see 24V DC (or close) on Genie sensors.
- If no voltage, check the opener unit and wires.
This test can confirm if the sensor or the wiring is at fault.

Credit: www.youtube.com
Common Mistakes To Avoid
Many homeowners make the same errors when fixing a blinking red sensor:
- Ignoring cleaning: Dust and cobwebs are often the culprit.
- Over-tightening brackets: This can damage the sensor, causing more problems.
- Mixing old and new sensors: Always replace sensors in pairs for best results.
- Overlooking sunlight: Direct light can break the beam, but it’s easy to miss.
- Forcing the door closed: Don’t bypass safety features except in emergencies.
Extra Tips For Long-term Reliability
- Label each sensor with the date of installation for easy tracking.
- Use surge protectors for your garage door opener to prevent electrical damage.
- Keep pets and children away from sensor wiring.
- Check your owner’s manual for model-specific troubleshooting steps.
Where To Find More Help
If you need technical details, Genie’s official website has manuals and support articles. For community advice, garage door forums are full of real-world solutions. For professional repairs, search for local garage door services with good reviews.
For extra information, see this Genie Company support page on sensor troubleshooting.
Frequently Asked Questions
Why Is My Genie Garage Door Sensor Blinking Red Even After Cleaning And Realigning?
If the blinking red light stays after cleaning and aligning, check the wiring for damage or loose connections. Sometimes, the sensor itself is faulty and needs replacement. Also, look for sunlight interference or moisture inside the sensor housing.
Can I Bypass The Genie Safety Sensors?
You can temporarily bypass the sensors by holding down the wall button to close the door. However, this disables the safety feature and is not recommended for regular use. It’s safer to fix the sensor problem as soon as possible.
How Do I Know If The Sensor Is Completely Broken?
A sensor that shows no light (even after checking power and wiring) is likely dead. If replacing the sensor restores normal function, the old sensor was faulty. If a new sensor doesn’t help, the issue may be with the opener’s circuit board.
Can Weather Affect Genie Garage Door Sensors?
Yes. Extreme cold, heat, or high humidity can cause sensors to misalign or collect moisture inside. Sunlight can also cause false signals. Regular checks and cleaning help prevent these issues.
Are Genie Sensors Compatible With Other Brands?
Usually, no. Genie sensors are designed for Genie openers. Other brands (like Chamberlain or Craftsman) use different wiring and signal types. Always use sensors that match your opener model.
Conclusion
When you see a Genie garage door sensor blinking red, don’t panic. Most problems have simple solutions you can do yourself. With careful steps—checking for obstructions, cleaning, realigning, and checking wiring—you’ll likely fix the issue quickly. Regular maintenance and understanding how the sensors work will keep your garage door safe and reliable for years. If all else fails, don’t hesitate to call a professional. Your garage door’s safety features protect your family and your property—so it’s worth taking the time to fix them right.

Credit: www.youtube.com