Cycling is more than just a way to get from one place to another. For many, it’s a passion, a daily commute, or a weekend adventure. But whether you ride in the city or on country roads, one thing is always true: visibility is crucial. As the sun sets or fog rolls in, being seen by other road users can be the difference between a safe ride and a dangerous one. That’s where bicycle blinking lights come in. These small devices have become essential for modern cyclists, providing a simple but effective way to stand out in low-light conditions.
You might think a regular reflector or a steady light is enough. But the truth is, blinking lights offer a unique advantage. They grab attention, signal your presence, and can adapt to different environments. In this article, you’ll learn everything you need to know about bicycle blinking lights—from how they work, to what to look for when buying, to some surprising insights that many beginners miss.
Whether you’re a daily commuter or a weekend explorer, you’ll discover how to choose and use these lights for maximum safety.
Why Bicycle Blinking Lights Matter
When you ride a bike at night or in bad weather, drivers, pedestrians, and even other cyclists may not see you. Regular lights help, but blinking lights do something more: they catch the eye. The human brain is wired to notice things that change quickly—like a flashing light—especially in the dark.
Visibility Saves Lives
According to the National Highway Traffic Safety Administration (NHTSA), nearly 75% of bicycle deaths occur in urban areas, and 45% happen in low-light conditions. Many of these could be prevented with better visibility. Blinking lights can make a cyclist up to 5 times more noticeable than with reflectors alone.
Legal Requirements
In many places, the law requires cyclists to have front and rear lights after dark. Some areas even specify that the rear light must blink. Failing to use proper lighting can lead to fines or even legal liability in an accident.
But even where it’s not required, using blinking lights is widely recommended by safety experts.
How Bicycle Blinking Lights Work
A bicycle blinking light is typically a small, battery-powered or USB-rechargeable device that attaches to the front or back of a bike. It uses LED bulbs that flash in a pattern, drawing attention from far away.
Common Flash Patterns
Different lights use different flash patterns. Some are slow and steady, others are rapid or irregular. Studies show that irregular flash patterns can be even more effective at getting attention than regular ones. Some lights allow you to switch between modes depending on your needs.
Power Sources
Bicycle blinking lights run on two main types of power:
- Disposable batteries (often AAA or AA): Easy to replace, but less eco-friendly.
- Rechargeable batteries (usually via USB): More convenient for regular riders, and better for the environment.
A good rechargeable light can last from 8 to 30 hours on a single charge, depending on brightness and mode.
Mounting And Placement
Most blinking lights use simple brackets or rubber straps to mount on your handlebars, seat post, or even helmet. Correct placement is key. The front light should face forward, at about eye-level for drivers. The rear light should be on the seat post, facing straight back.
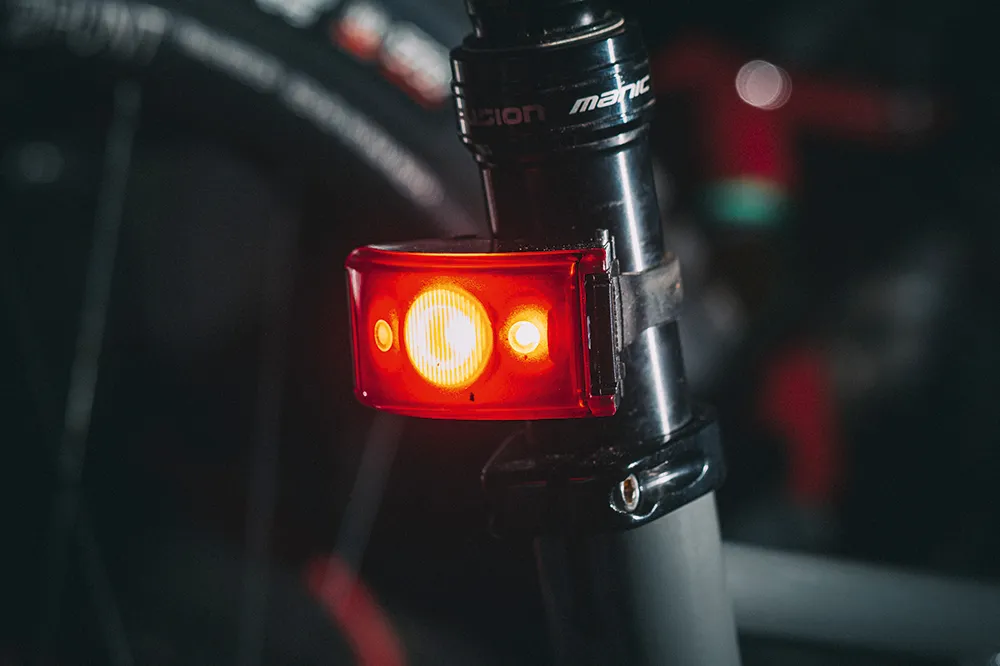
Credit: www.bikeradar.com
Types Of Bicycle Blinking Lights
There are many types of blinking lights available today. Here are the most common:
| Type | Front or Rear | Power Source | Brightness (Lumens) | Best Use |
|---|---|---|---|---|
| Standard LED Blinker | Front/Rear | Battery/USB | 10-100 | Urban commuting |
| High-Output Flasher | Front/Rear | USB | 100-500 | High-traffic areas |
| Helmet-Mounted Blinker | Rear | USB | 5-30 | Extra visibility |
| Wheel/Spoke Lights | Side | Battery | Varies | Side visibility |
Non-obvious insight: Many cyclists forget about side visibility. Standard front and rear lights won’t help if a car approaches from the side. Adding spoke or wheel lights can make you far more visible at intersections.
Key Features To Consider When Buying
Choosing the best bicycle blinking light can be confusing. Here’s what really matters:
1. Brightness
Measured in lumens, brightness determines how far your light can be seen. For city riding, 20-100 lumens is usually enough. For rural roads or high-speed traffic, go for 100+ lumens.
Tip: More lumens isn’t always better. Too-bright rear lights can actually blind drivers or other cyclists behind you.
2. Battery Life
Long battery life means fewer worries on long rides. Check both the maximum (steady mode) and blinking mode runtimes. Some models have battery indicators so you know when it’s time to recharge.
3. Mounting Options
Look for lights with flexible mounts. Rubber straps fit most bikes and make it easy to move lights between bikes. Some lights can also be clipped to bags or clothing.
4. Water Resistance
Good lights are at least IPX4-rated (resistant to splashes). If you ride in heavy rain, choose IPX6 or higher.
5. Flash Patterns
More flash patterns give you more control. Some riders prefer a fast strobe in busy traffic and a slower flash on quiet roads.
6. Size And Weight
Compact lights are easier to carry and less likely to get stolen if you need to remove them.
7. Price And Value
While you can find lights for as little as $10, higher-quality models (around $30–$80) usually offer better brightness, longer battery life, and stronger construction.

Credit: www.amazon.com
How To Use Bicycle Blinking Lights Effectively
Owning a good blinking light isn’t enough. How you use it makes a big difference.
Daytime Running Lights
Many cyclists only use lights at night. But studies show that running lights during the day can reduce accidents by up to 19%. A bright, blinking light helps drivers see you against a busy background.
Front And Rear Placement
Always use both front (white) and rear (red) blinking lights. The front light helps you see and be seen. The rear light warns cars approaching from behind.
Angle And Direction
Make sure your lights point straight ahead or straight back, not at the ground or into the sky. This improves visibility for other road users.
Combine With Reflectors
Lights are great, but reflectors add another layer of safety. Reflectors bounce back car headlights, while your blinking lights grab attention.
Regular Checks
Charge your lights before every ride. Replace batteries regularly. Dirt, mud, or water can block light, so wipe them clean often.
Comparison: Blinking Vs. Steady Lights
You might wonder if a steady light is better than a blinking one. Here’s a quick comparison:
| Feature | Blinking Light | Steady Light |
|---|---|---|
| Visibility | High, especially in traffic | Good, but less attention-grabbing |
| Battery Life | Usually longer (uses less energy) | Shorter |
| Legal Acceptability | Legal in most places, but check local rules | Required in some areas for front light |
| Best Use | Being noticed by others | Seeing the road ahead |
Expert tip: Some riders use both at once—a steady front light to see, plus a blinking one to be seen.
Common Mistakes Cyclists Make With Blinking Lights
Even experienced cyclists sometimes get things wrong. Avoid these mistakes:
- Mounting too low or high: Lights should be at the same height as car headlights.
- Forgetting the side view: Use spoke or wheel lights for intersection safety.
- Overly bright rear lights: Can blind drivers and make it harder for them to judge distance.
- Not charging or replacing batteries: A dead light is as bad as no light.
- Ignoring weather resistance: Cheap lights may fail in rain or snow.
Best Practices For Night And Urban Riding
If you ride in the city after dark, you face unique risks. Here are some practical steps:
Use Multiple Lights
Combine a steady headlight (to see) with a blinking front and rear light (to be seen). Add spoke lights for side visibility.
Dress For Visibility
Wear reflective clothing or accessories. Even the brightest light works better when paired with reflective strips on your legs or arms.
Choose The Right Route
Pick routes with good street lighting, bike lanes, and less traffic whenever possible.
Signal Your Turns
Use hand signals clearly, and consider a handlebar blinker for extra notice when turning.
Watch Out At Intersections
Most bike accidents happen at intersections. Slow down, make eye contact with drivers, and use your lights to be extra visible.
Maintenance Tips For Long-lasting Blinking Lights
A good set of lights should last several years with the right care.
- Charge regularly: Don’t wait until the battery is dead. Charge after every few rides.
- Store indoors: Extreme heat or cold reduces battery life.
- Clean often: Mud, sand, and salt can block LEDs or corrode contacts.
- Check mounts: Make sure straps or brackets are tight, so the light doesn’t bounce or fall off.
- Update firmware: Some high-end lights let you update their software for new features or better performance.
How To Choose The Right Blinking Light For Your Needs
With so many options, it can be hard to pick. Here’s a quick guide:
| Rider Type | Recommended Brightness | Battery Type | Special Features |
|---|---|---|---|
| Urban commuter | 20-100 lumens | Rechargeable | Daytime flash, compact size |
| Road cyclist | 100-300 lumens | Rechargeable | Long battery life, multiple flash modes |
| Off-road/Mountain biker | 200+ lumens | Rechargeable | Robust build, water resistance |
| Occasional rider | 10-30 lumens | Battery/Rechargeable | Affordable, easy mounting |
Hidden insight: Don’t just buy the brightest light. Think about where you ride, how long, and how often. A super-bright light is great for country roads but may annoy others on bike paths.

Credit: luminisinnovation.hu
Environmental Impact And Sustainability
Battery waste is a real issue. Choose USB-rechargeable lights to reduce the number of batteries thrown away each year. Many companies also offer recyclable packaging and eco-friendly materials.
Some brands now use solar charging or energy-harvesting technology, letting you top up your light while riding. These are still new, but the technology is advancing quickly.
Innovations And Trends In Bicycle Blinking Lights
The world of bike lights is changing fast. Here are some trends to watch:
- Smart lights: Some models connect to your phone, automatically adjusting brightness based on speed or light conditions.
- Brake lights: New rear lights can sense when you slow down and shine brighter, just like a car brake light.
- Radar integration: High-end lights now work with radar to alert you of cars behind and increase brightness when needed.
- Group ride modes: Some lights avoid blinding fellow cyclists by syncing with each other in a group.
These features are still mostly found in premium models, but prices are coming down as the technology spreads.
Legal And Safety Considerations
Before you buy, check your local laws. Some places only allow blinking on rear lights, not the front. Others require a minimum brightness or specific color (white front, red rear).
Never use blue or green flashing lights—these can be mistaken for emergency vehicles and may be illegal.
Safety standards like ANSI FL-1 help you compare brightness and battery life across brands. Look for lights that meet or exceed these standards.
For more detailed regulations, see the Wikipedia page on bicycle lighting.
Frequently Asked Questions
How Bright Should My Bicycle Blinking Light Be?
For city cycling, a front light with 20-100 lumens and a rear light with 10-50 lumens is usually enough. In rural or poorly lit areas, look for brighter options—up to 300 lumens in front and 100 lumens at the rear. Remember, more isn’t always better if it blinds others.
Can I Use A Blinking Light During The Day?
Yes, and you should! Daytime running lights make you more visible, especially in busy traffic or when sunlight creates shadows. Studies show that using blinking lights during the day can reduce collisions by almost one fifth.
Are Blinking Lights Legal Everywhere?
Not everywhere. Most places allow blinking on rear lights but may require a steady front light. Some areas ban blinking lights altogether or set rules for flash rate and brightness. Always check your local cycling laws.
How Long Does A Typical Blinking Light Battery Last?
It depends on the light and mode. Most rechargeable blinking lights last between 8 and 30 hours on a single charge. Disposable battery models may last longer but cost more to run. Always check the manufacturer’s specs for both steady and flashing modes.
Do I Still Need Reflectors If I Use Blinking Lights?
Yes. Reflectors work when car headlights shine on you, while blinking lights help you stand out in all conditions. Using both gives you the best chance to be seen from every angle, especially at intersections.
Bicycle blinking lights are more than just an accessory—they’re a key part of riding safely in today’s world. With the right light, placed correctly and used every time you ride, you dramatically increase your chances of being seen and staying safe.
Remember to choose a light that fits your riding style, keep it charged, and always combine it with other visibility tools. Whether you’re cycling to work or exploring new trails, a good set of blinking lights is one investment you’ll never regret.
Stay safe and keep riding!