
If you power on your MacBook and see a blinking question mark, it can feel alarming. Many people worry their computer is broken or their files are gone. But this symbol is actually your Mac’s way of telling you it cannot find the startup disk. Whether you’re a student, a remote worker, or a creative professional, this issue can bring your day to a halt. In this guide, you’ll learn what the blinking question mark means, why it appears, and, most importantly, how to fix it. You’ll also discover common mistakes and tips that can save you time and frustration.
What Does The Blinking Question Mark Mean?
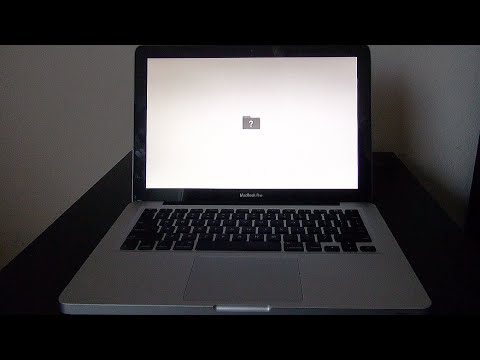
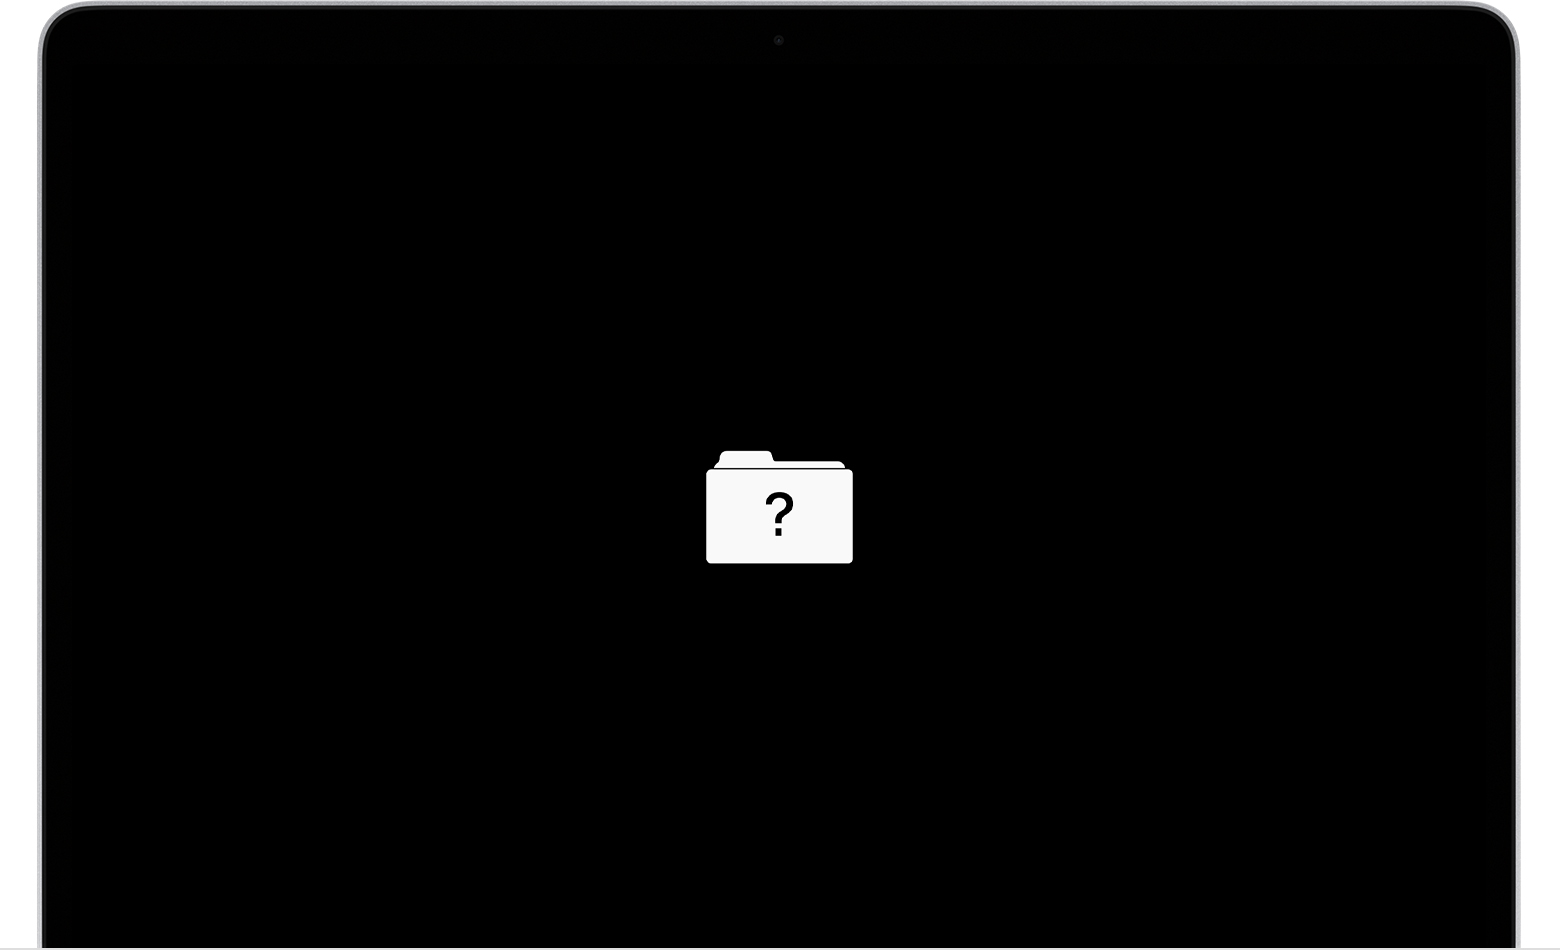
When you see a blinking folder with a question mark on your MacBook screen, it means your Mac can’t find a valid operating system to start from. In simple words, your Mac is looking for its “brain” (macOS), but it can’t find it. This can happen for a few reasons:
- The startup disk is missing or disconnected
- The hard drive or SSD has failed
- The macOS installation is corrupted
- The system is looking at the wrong disk
This symbol might stay on the screen, or it may blink for a few seconds and then your Mac tries to start up.
Common Causes Of The Blinking Question Mark
Understanding why this icon appears helps you choose the best solution. Here are the most common causes:
- Loose or disconnected internal drive: If you’ve dropped your MacBook, the drive’s connection could be loose.
- Damaged or failed drive: Over time, hard drives or SSDs can fail, especially if your MacBook is older.
- Corrupted macOS: Sometimes, system files become damaged by a failed update or malware.
- Wrong startup disk selection: After changing disks or connecting external drives, the Mac may look in the wrong place.
- FileVault or encryption issues: If FileVault is interrupted during encryption, startup can fail.
Credit: www.youtube.com
Immediate Steps: What To Do First
When you first see the question mark, don’t panic. Here’s what you should try before any advanced fixes:
- Restart your MacBook: Sometimes, a simple reboot solves temporary glitches.
- Check for loose connections: If you know how, check inside for any loose cables (especially if you recently dropped or bumped your MacBook).
- Disconnect external devices: Remove all USB drives, SD cards, or external hard drives.
- Hold down the power button to force shutdown, then turn it back on.
If the question mark appears again, you’ll need to move to the next steps.
How To Fix The Blinking Question Mark
There’s no one-size-fits-all answer, but these steps will help most users find and solve the root cause.
Step 1: Select The Startup Disk In Recovery Mode
Often, your MacBook just needs to be told where to look for macOS.
- Turn off your MacBook.
- Press the power button, then immediately hold Command (⌘) + R to enter macOS Recovery.
- Once in Recovery Mode, select Startup Disk from the menu.
- Choose your internal disk (usually named “Macintosh HD”).
- Restart your Mac.
If the disk doesn’t appear, this means your MacBook can’t see the drive.
Step 2: Use Disk Utility To Check The Drive
Disk Utility is a built-in tool for checking and repairing disk errors.
- In Recovery Mode, open Disk Utility.
- Select your internal drive from the sidebar.
- Click First Aid and run the check.
- If Disk Utility finds and repairs errors, restart your Mac.
- If you get “Disk not found” or “Cannot repair,” the drive may be failing.
Step 3: Reinstall Macos
If your drive appears healthy but your MacBook still won’t start, macOS may be corrupted.
- In Recovery Mode, select Reinstall macOS.
- Follow the on-screen instructions.
This process will attempt to reinstall the operating system without erasing your files. However, it’s always smart to have a backup.
Step 4: Restore From A Time Machine Backup
If you have a Time Machine backup, you can restore your system to an earlier date.
- In Recovery Mode, choose Restore from Time Machine Backup.
- Select your backup disk and a recent backup.
- Complete the restoration process.
Step 5: Seek Professional Help
If none of these steps work, the issue may be physical damage or a failed drive. In this case, you should:
- Visit an Apple Store or an authorized repair center.
- Ask about data recovery if your files are important.
- Consider drive replacement if your MacBook is older.
When To Replace Vs. Repair
Sometimes the best solution is to replace the drive, especially if your MacBook is several years old. Here’s a quick comparison of repair versus replacement:
| Situation | Repair | Replace |
|---|---|---|
| Minor Disk Errors | Run Disk Utility | Not needed |
| Major Hardware Failure | Possible but risky | Recommended |
| macOS Corruption | Reinstall macOS | Not needed |
| Old Computer (5+ years) | Temporary solution | Best for long term |
Data Loss Risks And Prevention
One big worry is losing important files. The blinking question mark can mean data is at risk, especially if the drive is failing. Here are key points to remember:
- MacOS reinstall usually does not erase your data, but it can if you choose the wrong options.
- Failed drives often require expert help for data recovery.
- Prevention: Always keep a current backup using Time Machine or another backup solution.
Backup Options Comparison
Not all backup methods are equal. Here’s a summary of popular options for MacBook users:
| Method | Pros | Cons |
|---|---|---|
| Time Machine | Automatic, easy to restore | Needs external drive, can be slow |
| iCloud Drive | Cloud-based, syncs across devices | Limited free space, not full system backup |
| Manual Copy | Simple, no special tools needed | Easy to forget, not automatic |
Credit: www.salvagedata.com
Common Mistakes To Avoid
People often make errors that make the problem worse. Here are some to watch out for:
- Forcing multiple restarts without checking the disk can damage files further.
- Reinstalling macOS blindly: If you erase the wrong disk, you could lose everything.
- Trying to open the MacBook yourself: Unless you know what you’re doing, you may void your warranty or cause more damage.
- Ignoring early warning signs: If your Mac was slow or made clicking sounds before, the drive may have been failing for a while.
Advanced Fixes For Tech-savvy Users
If you’re comfortable with computers and want more control, try these options:
Use Internet Recovery
If local Recovery Mode doesn’t work, try Internet Recovery:
- Turn off your MacBook.
- Hold Command (⌘) + Option (⌥) + R as you turn it on.
- This downloads Recovery tools from Apple’s servers.
Reset Nvram/pram
Sometimes, resetting the memory that stores startup disk info helps:
- Turn off your MacBook.
- Hold Option + Command + P + R for about 20 seconds when you turn it on.
Use Terminal In Recovery Mode
You can access Terminal from the Utilities menu in Recovery Mode. Advanced users can check disk status, repair with fsck, or run diagnostics. This is risky if you’re not experienced.
Credit: www.reddit.com
How To Prevent The Blinking Question Mark In The Future
You can reduce the chance of seeing the blinking question mark with these habits:
- Keep regular backups using Time Machine or cloud services.
- Run Disk Utility’s First Aid every few months to catch early disk errors.
- Install system updates to protect against bugs and vulnerabilities.
- Avoid physical shocks: Don’t drop or shake your MacBook.
- Free up storage: A full drive can cause system problems and increase the risk of corruption.
Real-world Example
Maria, a freelance designer, once saw the blinking question mark after her MacBook battery died during an update. She was worried she’d lost her client work. By entering Recovery Mode, running Disk Utility, and reinstalling macOS, she fixed the issue without losing files.
Later, she set up automatic Time Machine backups and never had the problem again.
When To Contact Apple Support
If you’ve tried all the steps above and still see the blinking question mark, it’s best to get help from professionals. Apple Support can diagnose hardware failures, help with data recovery, and advise on repairs or replacements. You can visit the nearest Apple Store or book a repair online via the Apple Support website.
Frequently Asked Questions
Why Did My Macbook Suddenly Show A Blinking Question Mark?
This usually means your Mac cannot find the system files it needs to start. It could be a simple software glitch, a failed update, or a sign of hardware problems like a failed disk.
Can I Fix The Blinking Question Mark Myself?
Yes, you can try the steps above, such as selecting the startup disk, using Disk Utility, or reinstalling macOS. If your drive is physically damaged, you may need expert help.
Will Reinstalling Macos Erase My Files?
Usually, reinstalling macOS from Recovery Mode keeps your files. But if you choose to erase the disk or the drive is badly damaged, data loss is possible. Always back up first if you can.
How Much Does It Cost To Fix A Failed Macbook Drive?
Prices vary. A simple software fix is free, but replacing an SSD can cost $200-$400 at an Apple Store. Data recovery is more expensive, sometimes over $1,000, depending on the damage.
How Can I Stop This From Happening Again?
Keep regular backups, avoid dropping your MacBook, and run Disk Utility checks every few months. Updating your system and using only trusted software can also help prevent problems.
Seeing the MacBook question mark blinking is stressful, but most users can fix it with patience and the right steps. The key is to act quickly, avoid risky actions, and keep your files backed up. With careful attention, you can get your MacBook running again and protect your data for the future.